
SPA data collection setup
SPA data collection setup
- initial microscope preparation
- Gain Reference
- Sample Insertion/Removal
Initial microscope preparation
- Stopping the currently running data collection.
- In SerialEM click on “End Navigator” (Dark Green Panel) and wait until the last image in the cycle is recorded.
- Save navigator file by clicking “Navigator –> Save”.
- Save log file by clicking “File –> Save Log”.
- Save settings file by clicking “Settings –> Save”.
- Set Image shift back to 0 by clicking “Reset Image shift” (yellow panel).
- Check when liquid nitrogen refill is happening next. The ideal goal is to either do the liquid nitrogen refill now or after the last coma free alignment (latest in 7h).
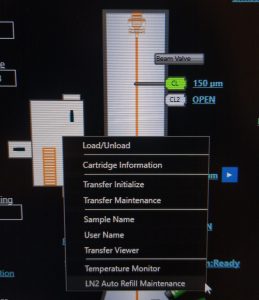
- Open the Liquid nitrogen monitor by right click on the microscope scheme in the TEM center and left click on “LN2 auto Refill Maintenance” (Figure 0)
- If it is less than 80% full, click on “refill” for “stage tank” and “transfer tank” (Figure 00)
- Wait until nitrogen filling is finished

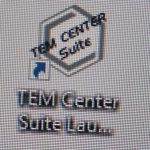
- On the microscope PC, if TEM center is not open, open TEM Center Suite launcher (Figure 1).
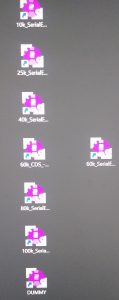
- On the camera PC, open the SerialEM executable with your desired imaging conditions (i.e. magnification and CDS/non-CDS mode) (Figure 2).
- Open Digital Micrograph, if not yet open, on the camera PC by clicking on the “GSM3” executable (Figure 3).

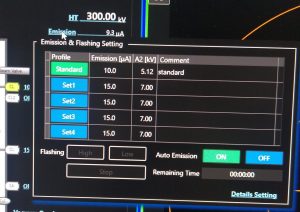
- If emission is on (visible in TEM center, on microscope scheme top right, Figure 4): In TEM center hover your mouse over “Emission” and click on “Auto Emission –> Off” (Figure 5). Wait until finished. Afterwards hover your mouse over “Emission” and click “Flashing High” (Figure 5). Once finished click on “Auto Emission –> ON”. Wait until the Emission is ramped up (It will show 10 uA). Else follow point 5.
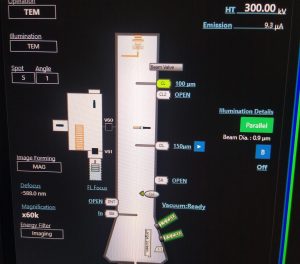
- If emission is off: In TEM center hover your mouse over “Emission” and click on “Flashing High” (Figure 5). Once finished click on “Auto Emission –> ON”. Wait until the Emission is ramped up (It will show 10 uA).
- Degauss the omega filter. Open in the TEM center the window by clicking in the menu on “Maintenance –> Filter Setting” (Figure 6).
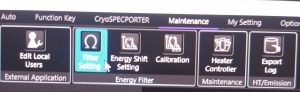
- In the Window Filter Setting click on “Degauss –> Start” (Figure 7). Note: The FL focus value is now offset and the filter will relax in the following hours. During most procedures that follow first, you can remove the Energy filter slit first, and only adjust FL focus once its really needed and probably more stable.

Figure 7: Filter degauss button
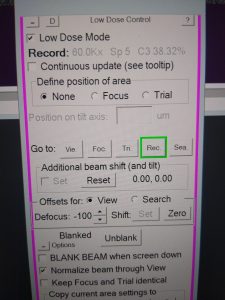
- In SerialEM, make sure you are in “Low Dose mode” and load “Record” mode (pink window, Figure 8).
- Remove the energy filter slit by pushing “Slit in” (right hand panel).
- If not yet open, open the “CryoSpecporter” window by right click on “microscope scheme (TEM center) –> Load/Unload (left click)” (Figure 13).

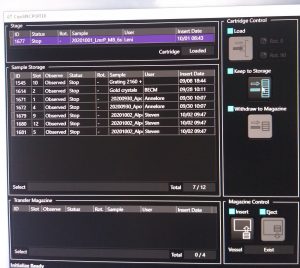
- Remove the grid from the stage by highlighting the stage sample and clicking on “Keep to storage” (CryoSpecporter window, Figure 14). Wait until the process is finished.
Gain reference
- Open Beam Valve with the “Beam” button (left hand panel).
- In SerialEM make one view image by clicking “View” (dark green panel) to ensure that the camera is in CDS or non-CDS mode (in case you use a different mode than the user before you). Note: Sometimes the camera temperature is still equilibrating (warning appears after attempting to make the image). In this case wait 5 seconds a redo the view image.
- Switch off low dose mode in SerialEM (pink panel).
- Remove the energy filter slit by pushing the “Slit In” button (right hand panel)
- Put down the large phosphor screen (Screen retract, right hand panel).
- Remove the OL aperture (double click on OL in microscope pictogram)
- Change spot size to 1 using the “Spot size” dial (left hand panel)
- Center the beam with the “Shift X&Y” dials (both hand panels) and spread the beam until it covers more or less the inner circle on the “Large Screen Camera” (Figure 15).
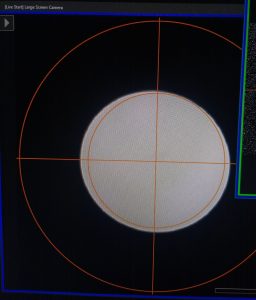
- In Digital Micrograph ensure that the Power User is activated in the menu “Help –> User –> Power User” (Figure 16).

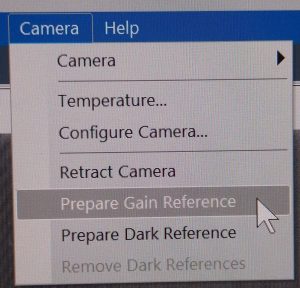
- In Digital Micrograph menu select “Camera –> Prepare Gain Reference” (Figure 17).
- In the new window select “Collect Gain Reference” (Figure18).

- Once the Dark Reference is done, lift the Phosphor Screen (“Screen Insert, right hand panel).
- Adjust the beam brightness (left hand panel), so that the measured dose in Digital micrograph corresponds more or less to the one requested (Should be 1280). If ready, click on “done” and wait until its done (~5 minutes) (Figure 19).

- Once done, put down the phosphor screen (“Screen retract”, right hand panel).
- Change spot size to 4 (if using non-CDS mode) or 5 (if using CDS mode) using the “spot size” dial (left hand panel).
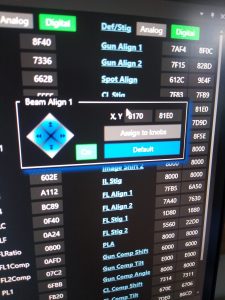
- Roughly center the beam, by hovering in the “Lens/Deflector” window over “Beam Align 1” and click on “Default” (Figure 20).
- Center the beam using the “Shift X&Y” dial (both hand panels) and spread the beam (“brightness dial”, left hand panel) until you have the beam fully covering the inner circle on the “Large Screen Camera” window (Figure 21).
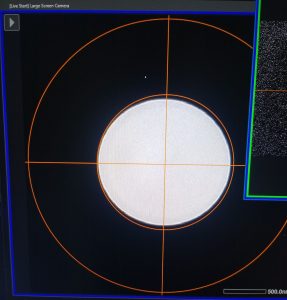
- In Digital Micrograph click in the open window on “Collect Gain Reference” (Figure 22).

- In the next window make sure that “expert mode” is not activated and click on “OK” (Figure 23).

- Once the dark reference is done, lift the Phosphor screen (“Screen retract”, right hand panel).
- Adjust the beam brightness (“brightness” dial, left hand panel) until the measured dose correspond pretty well to the requested dose (usually: non CDS mode 18, CDS mode 7.5) (Figure 24).

- Then, confirm the window by clicking “Done”. Wait until the procedure is done (~8 minutes).
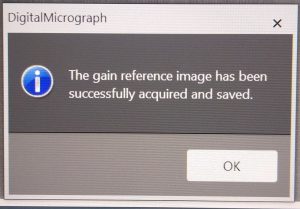
- On the next window click “OK” (Figure 25).
- In SerialEM activate “Low Dose Mode” (pink panel, Figure 26) and select record mode (“Rec.”).

- Insert large phosphor screen (Screen retract, right hand panel).
- Center the beam on the phosphor screen using the “Shift X&Y” dials (both hand panels).
- Lift up the large phosphor screen (Screen retract, right hand panel).
- Unblank the beam using “blanking” button (right hand panel)
- In Digital micrograph, if not open, open the technique manager using the menu via “Window –> Floating windows –> Technique manager” (Figure 27).

- In the technique manager window select “TEM Imaging” and choose”camera bin 1x”, set exposure time in view to 0.1 s and click on “View” (Figure 28) to obtain a continuous mode image.

- Check the image in the digital micrograph window and make sure that it does not show any artefacts. If it does, repeat the gain reference.
- Check on the bottom of the Digital micrograph window the measured dose rate in e-/px/s (Figure 29). The saturation should be 0%. Write down the dose rate in the online log book and use this value to calculate your frame dose rate for data processing.

- Switch off the “View” mode in Digital Micrograph, Technique manager.
- Blank the beam again using the “Blanking” button (right hand panel).
- Close the beam valve using the “beam” button (left hand panel).
Sample Insertion/Removal
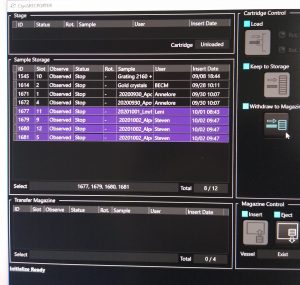
- Remove previous samples. If the magazine is still present in the microscope, select in the “CryoSpecporter” window up to 4 samples to remove and click on “Withdraw to Magazine” (Figure 30).
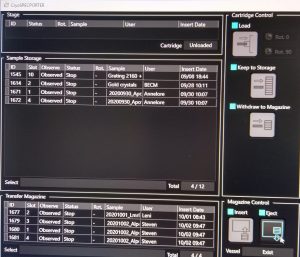
- Once the cartridges are in the transfer magazine click in the “CryoSpecporter” window on “Eject” (Figure 31).
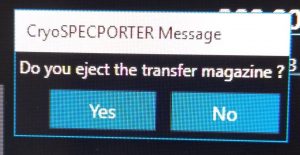
- In the newly opened window click “Yes” (Figure 32) and wait until the cup with the magazine dropped.
- Now you can physically remove the mug from the microscope (Figure 33&34).
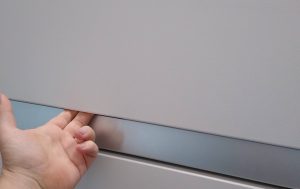
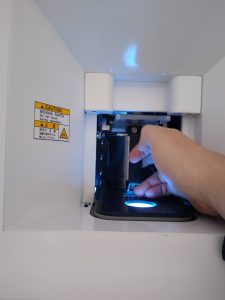
- Insert the mug with your new cartridges into the microscope by pushing the mug deep into the system. The lid will slide of automatically (Figure 35).
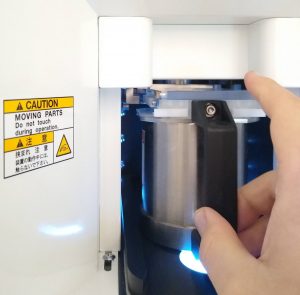
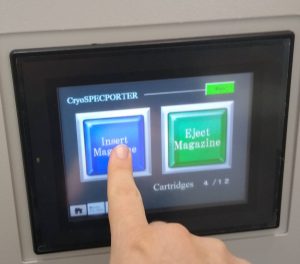
- On the touch panel on the right hand side touch to wake up the display and select “Insert Magazine” (Figure 36).
- Once the magazine is in the microscope the cartridges will be recognized by the microscope and can be seen in the “Transfer Magazine” part of the “Cryospecporter” window (Figure 37). Then the cartridges will be moved into the sample storage.
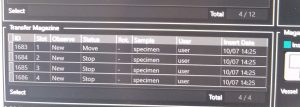
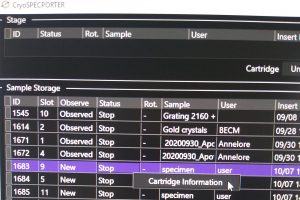
- Finally name the cartridges. Right click on the sample –> “cartridge information (left click)” (Figure 38). In the newly open window define “Sample Name” and “User Name” (Figure 39). Note: These names are not used automatically as file name of your images.
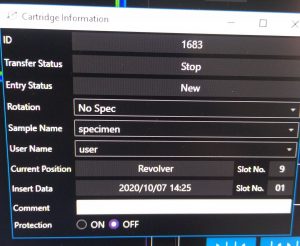
- Repeat the naming for all the cartridges you inserted.