CryoARM failure recovery
Lenses switched off (recovery)
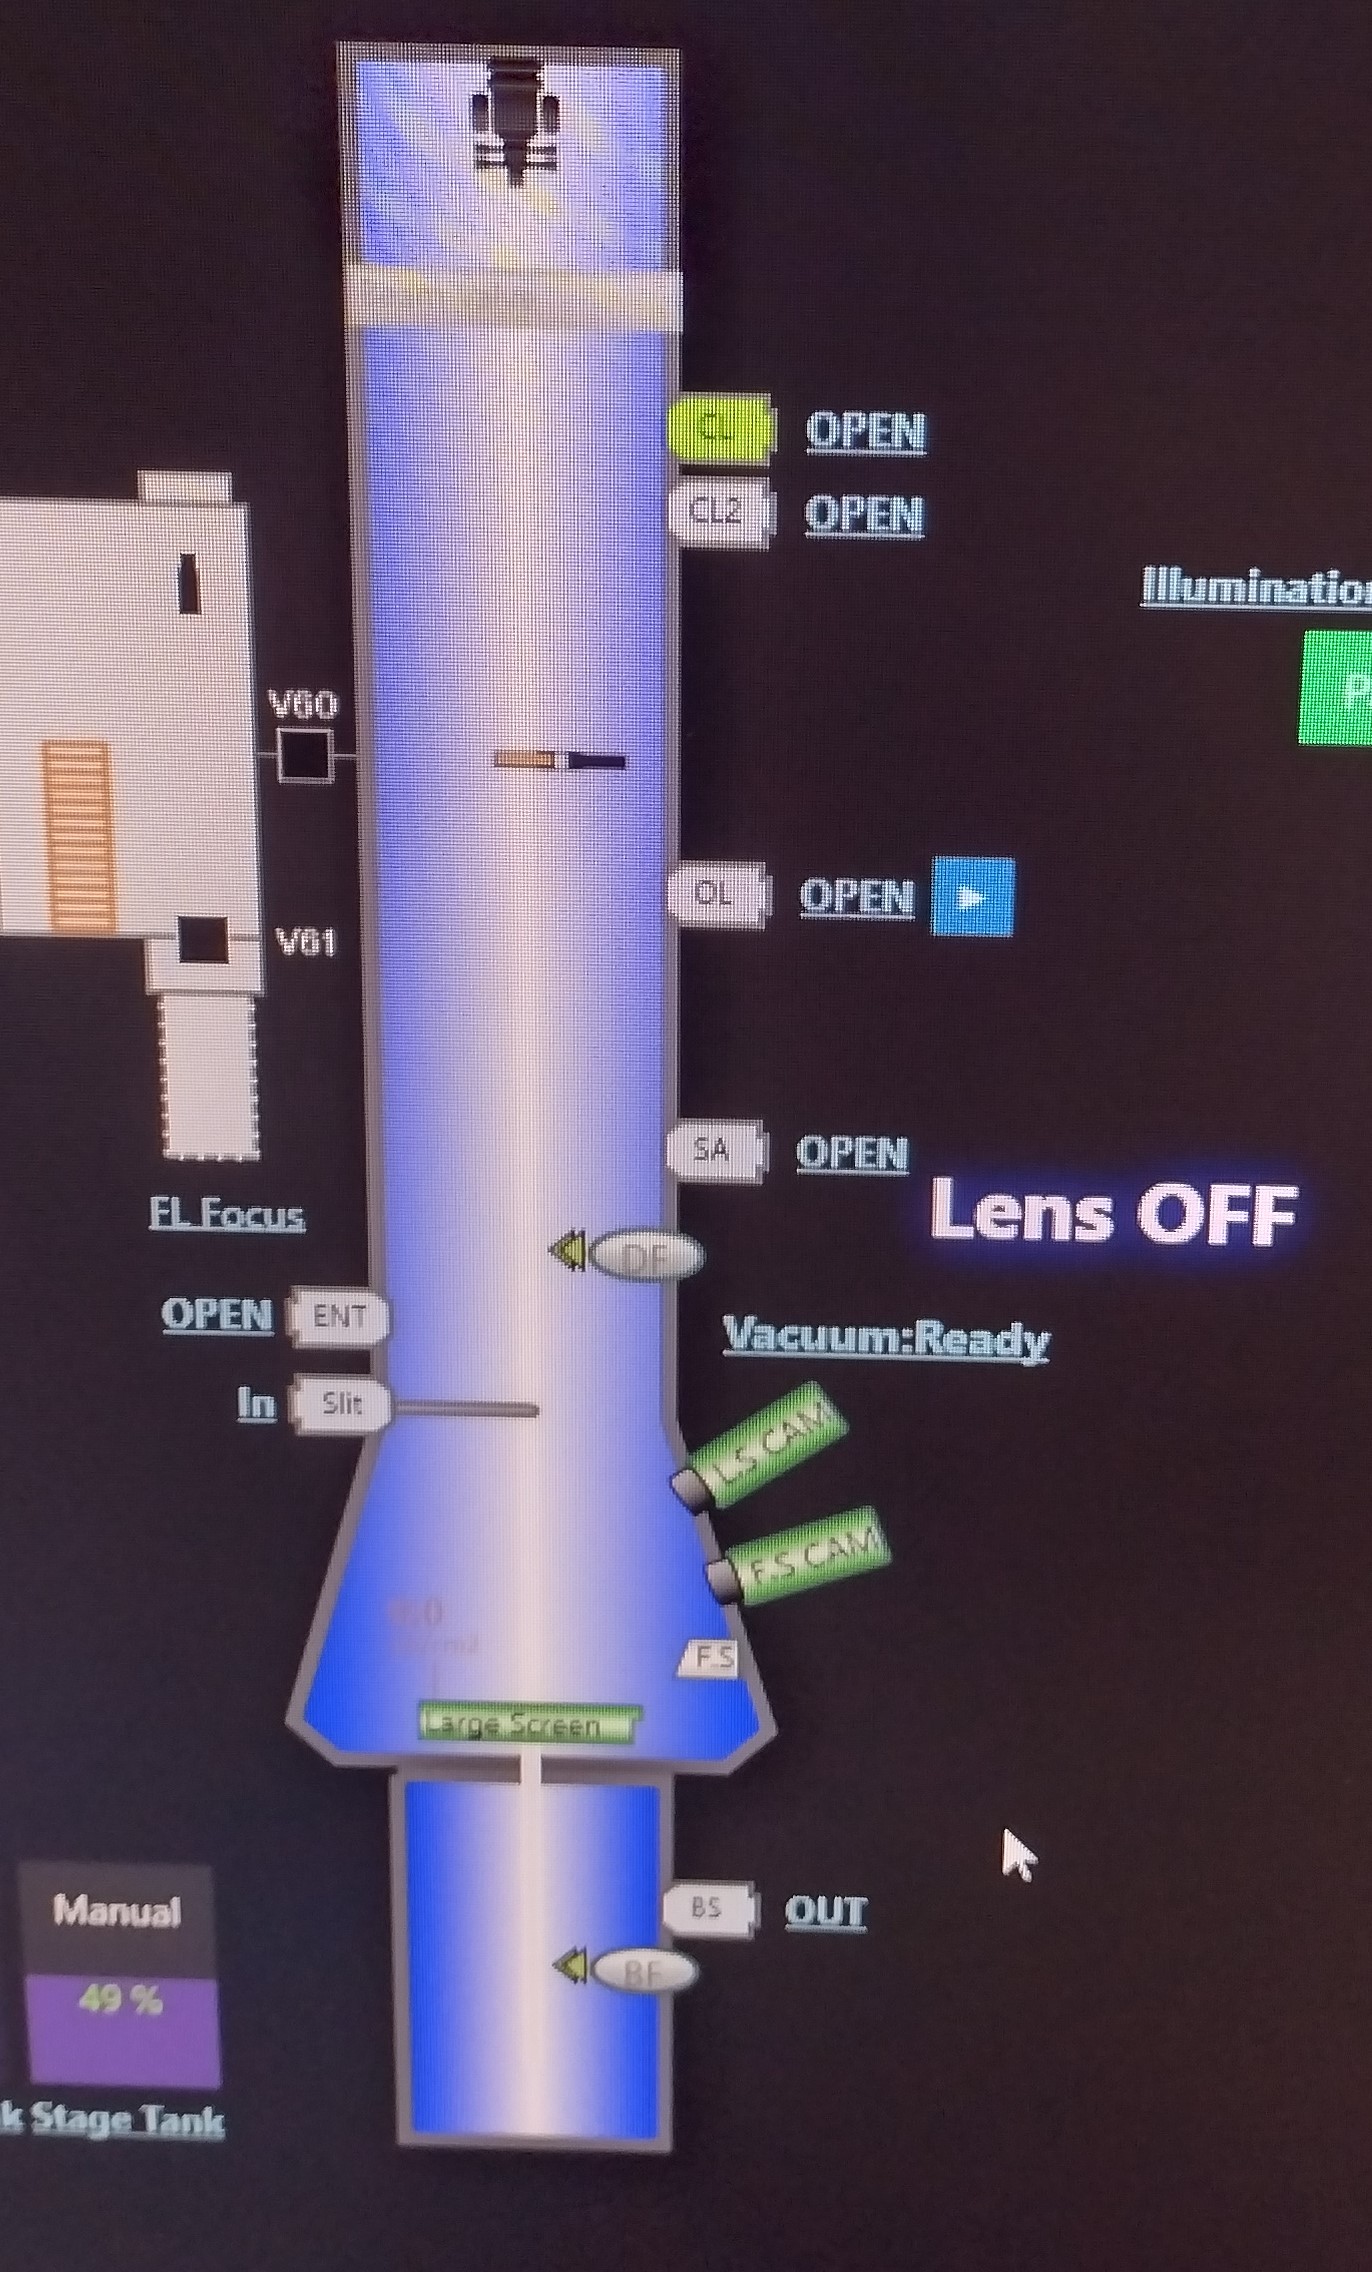
In the TEM center pictogram the color of the column changed to blue and the text indicates "Lens OFF".
- Check if the vacuum in the column is good. If not, figure our why and solve that problem first.
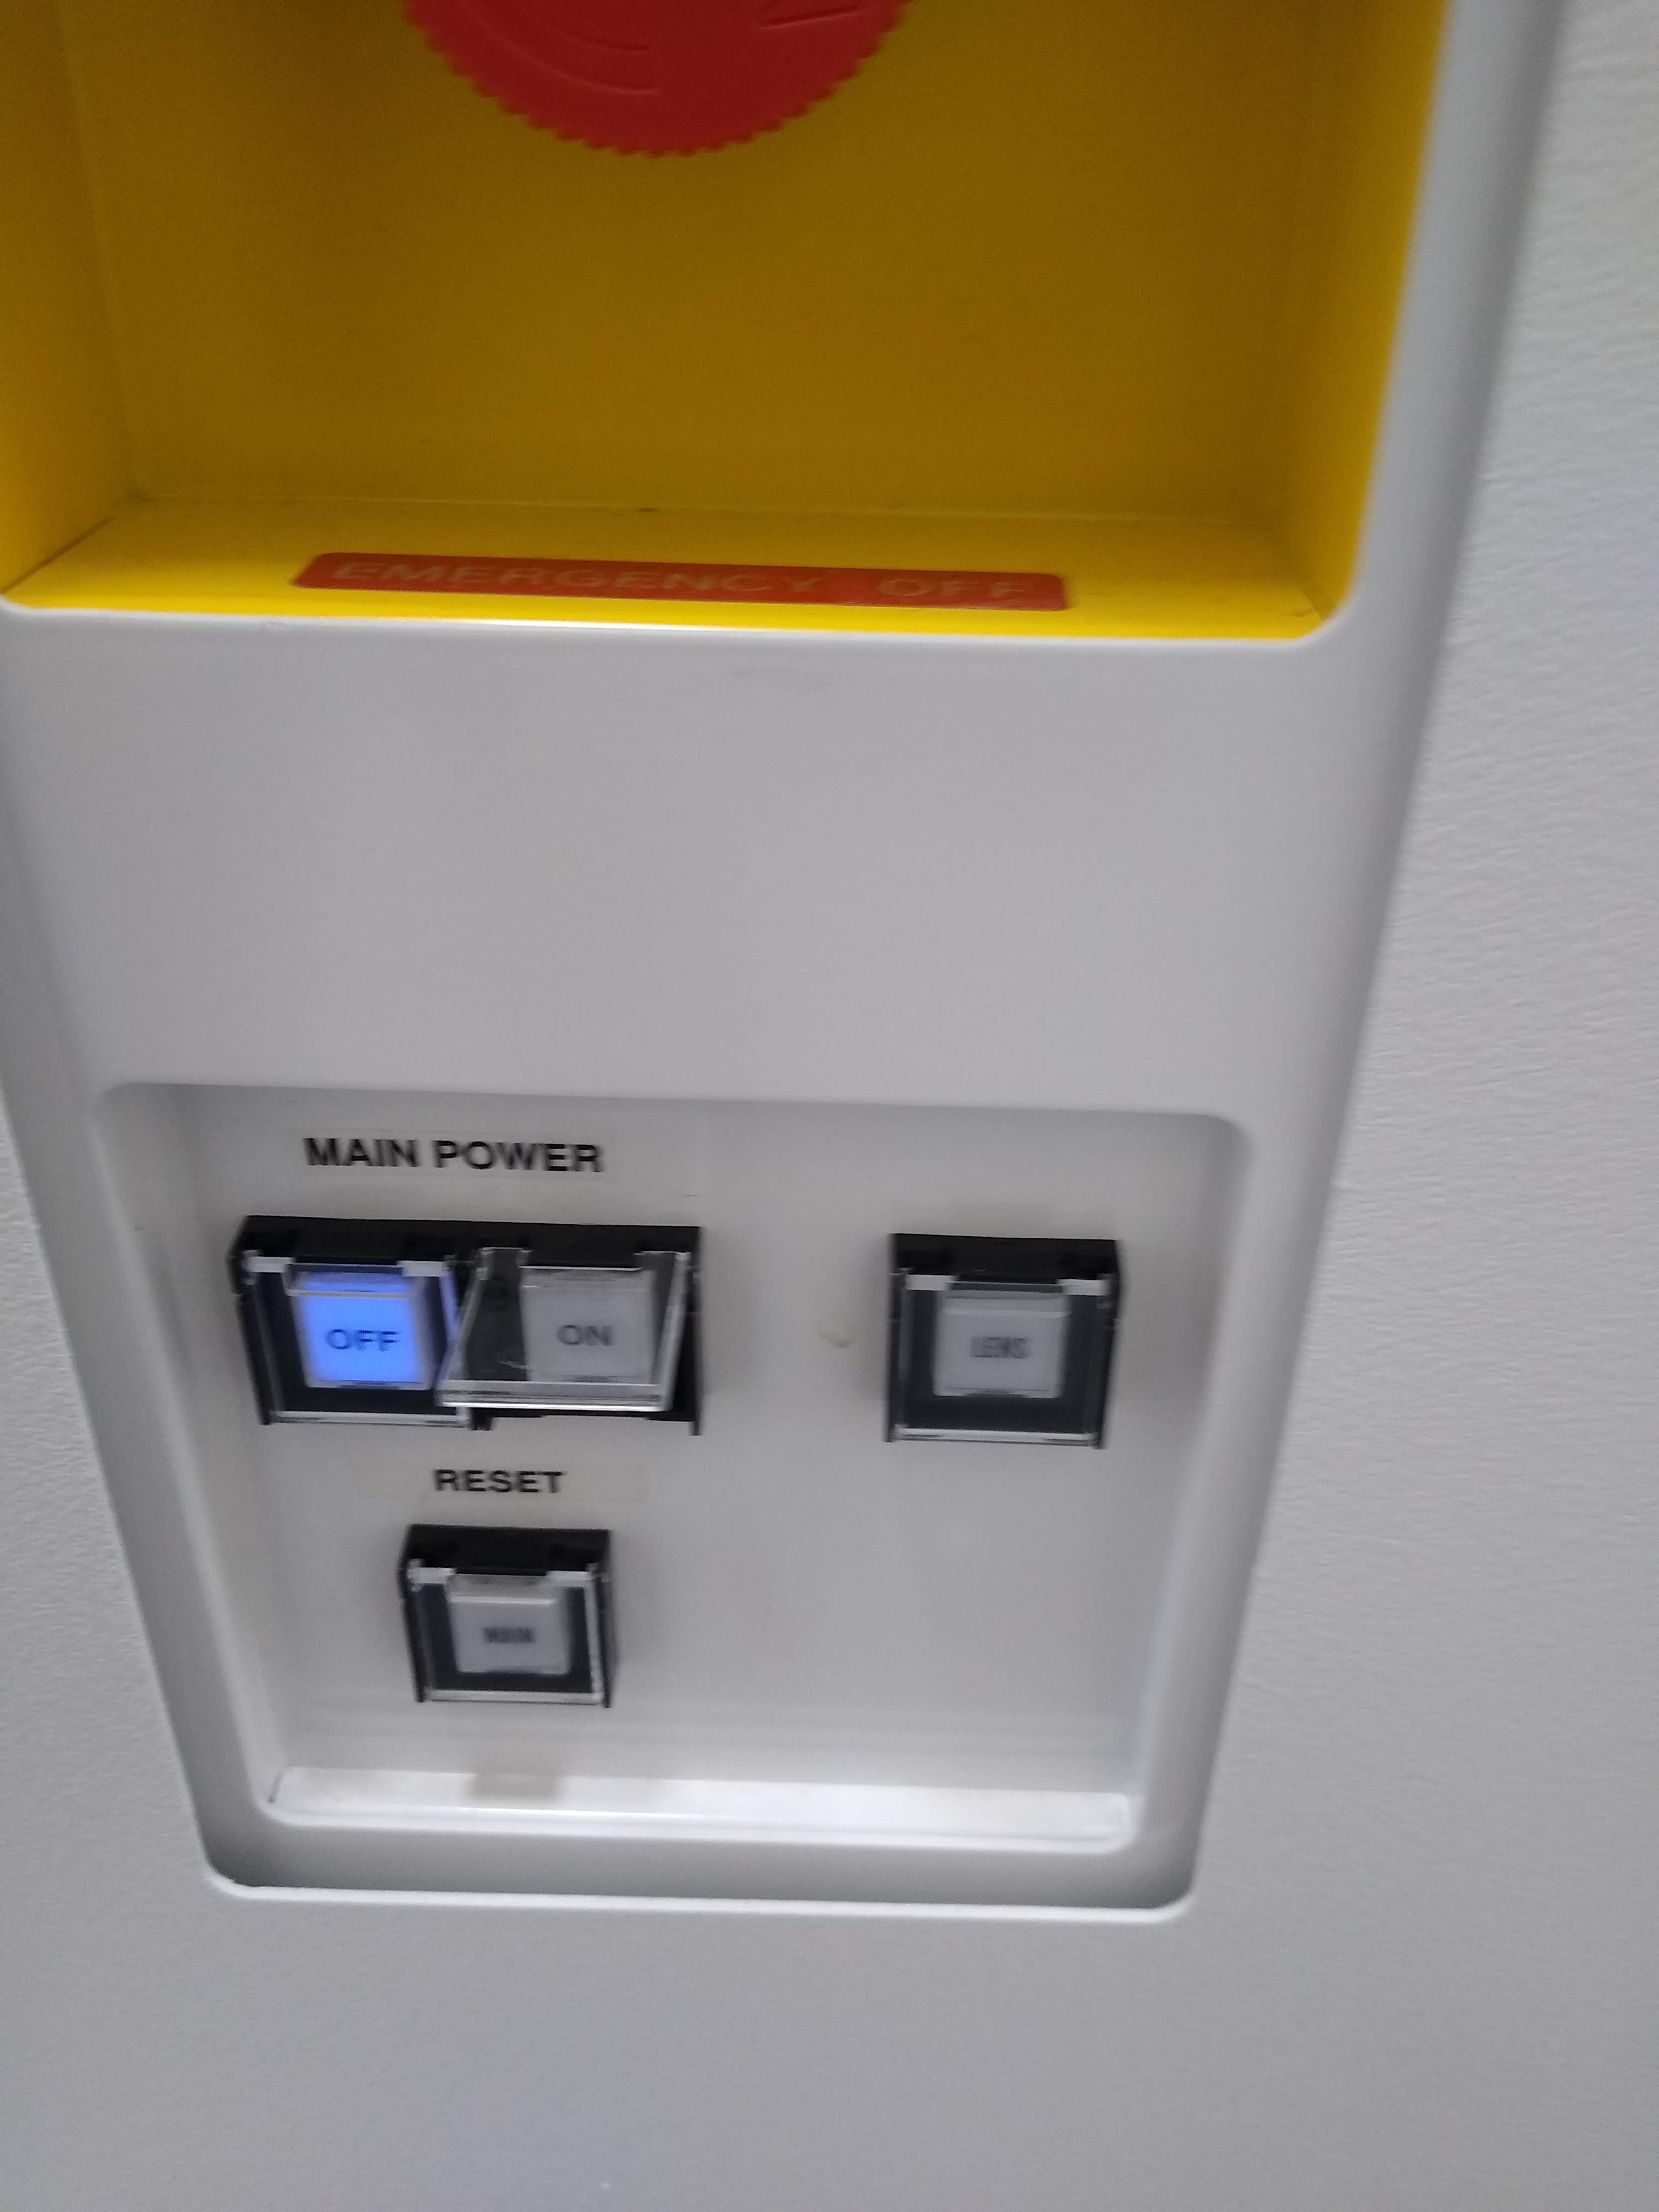
- On the right side of the microscope is a area with buttons controlling the lens status.
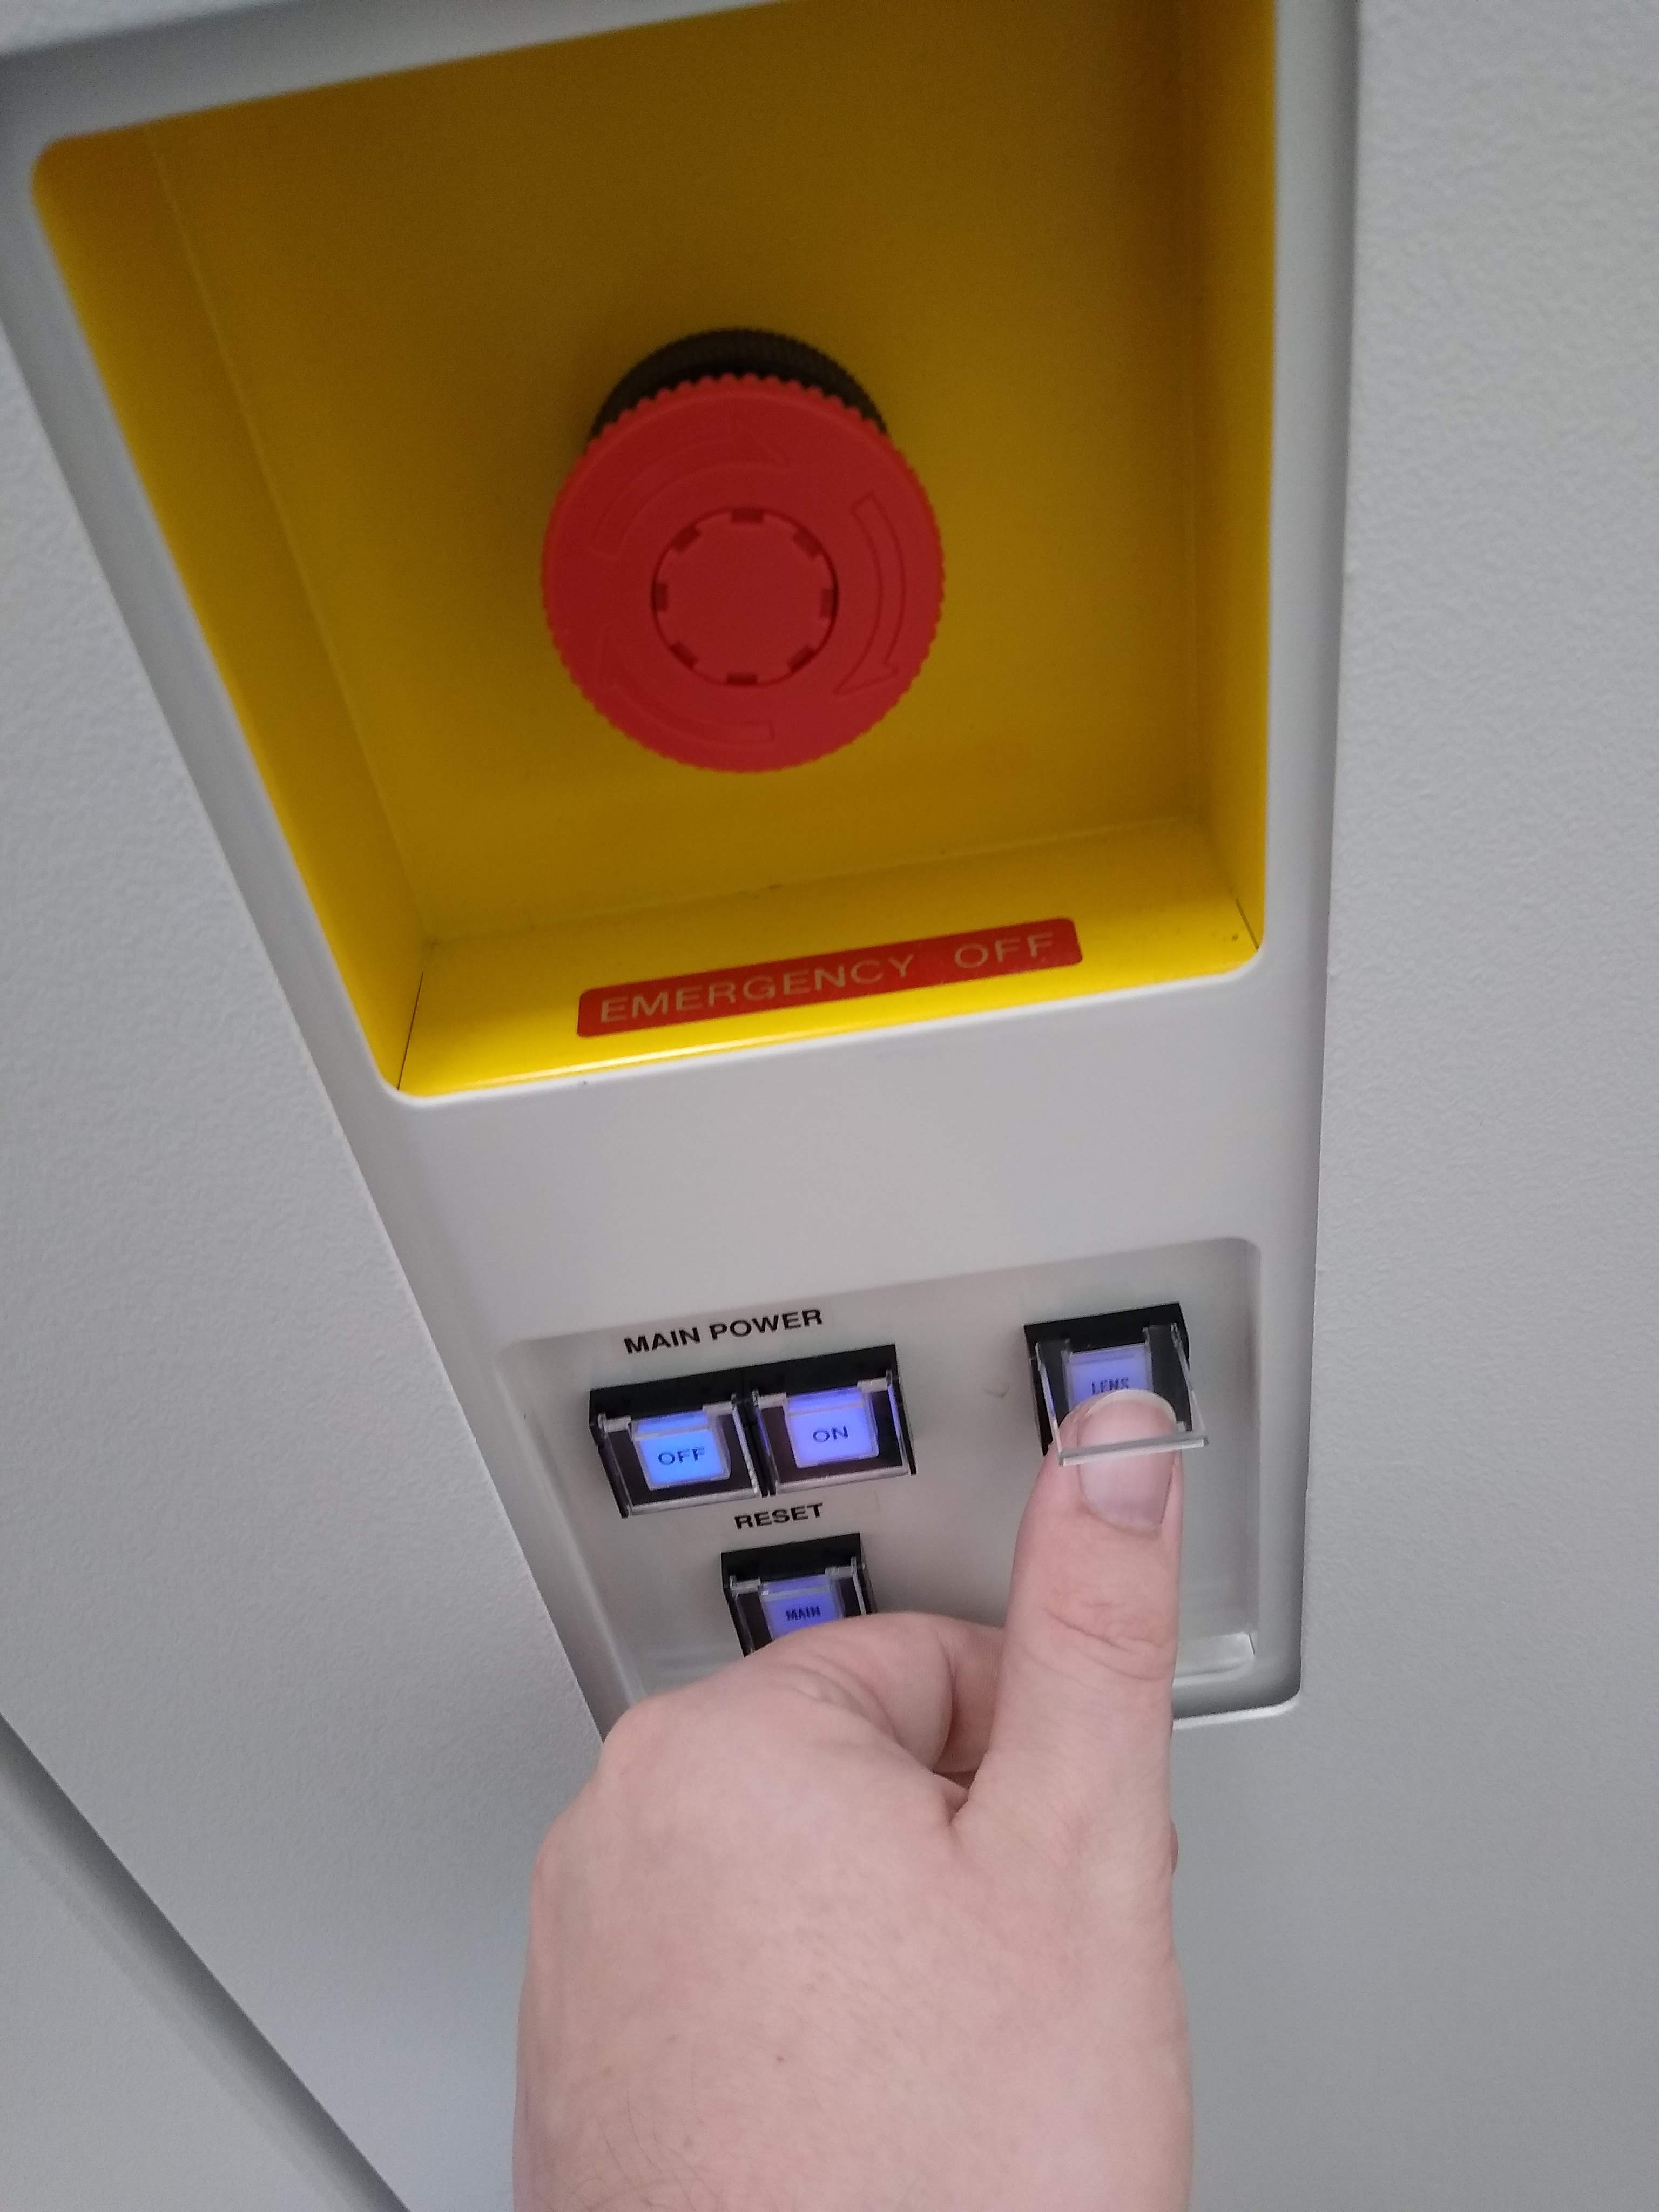
- Push the button "Lens" to switch the lenses off properly (Figure 2). The lens button should not be lit up anymore.
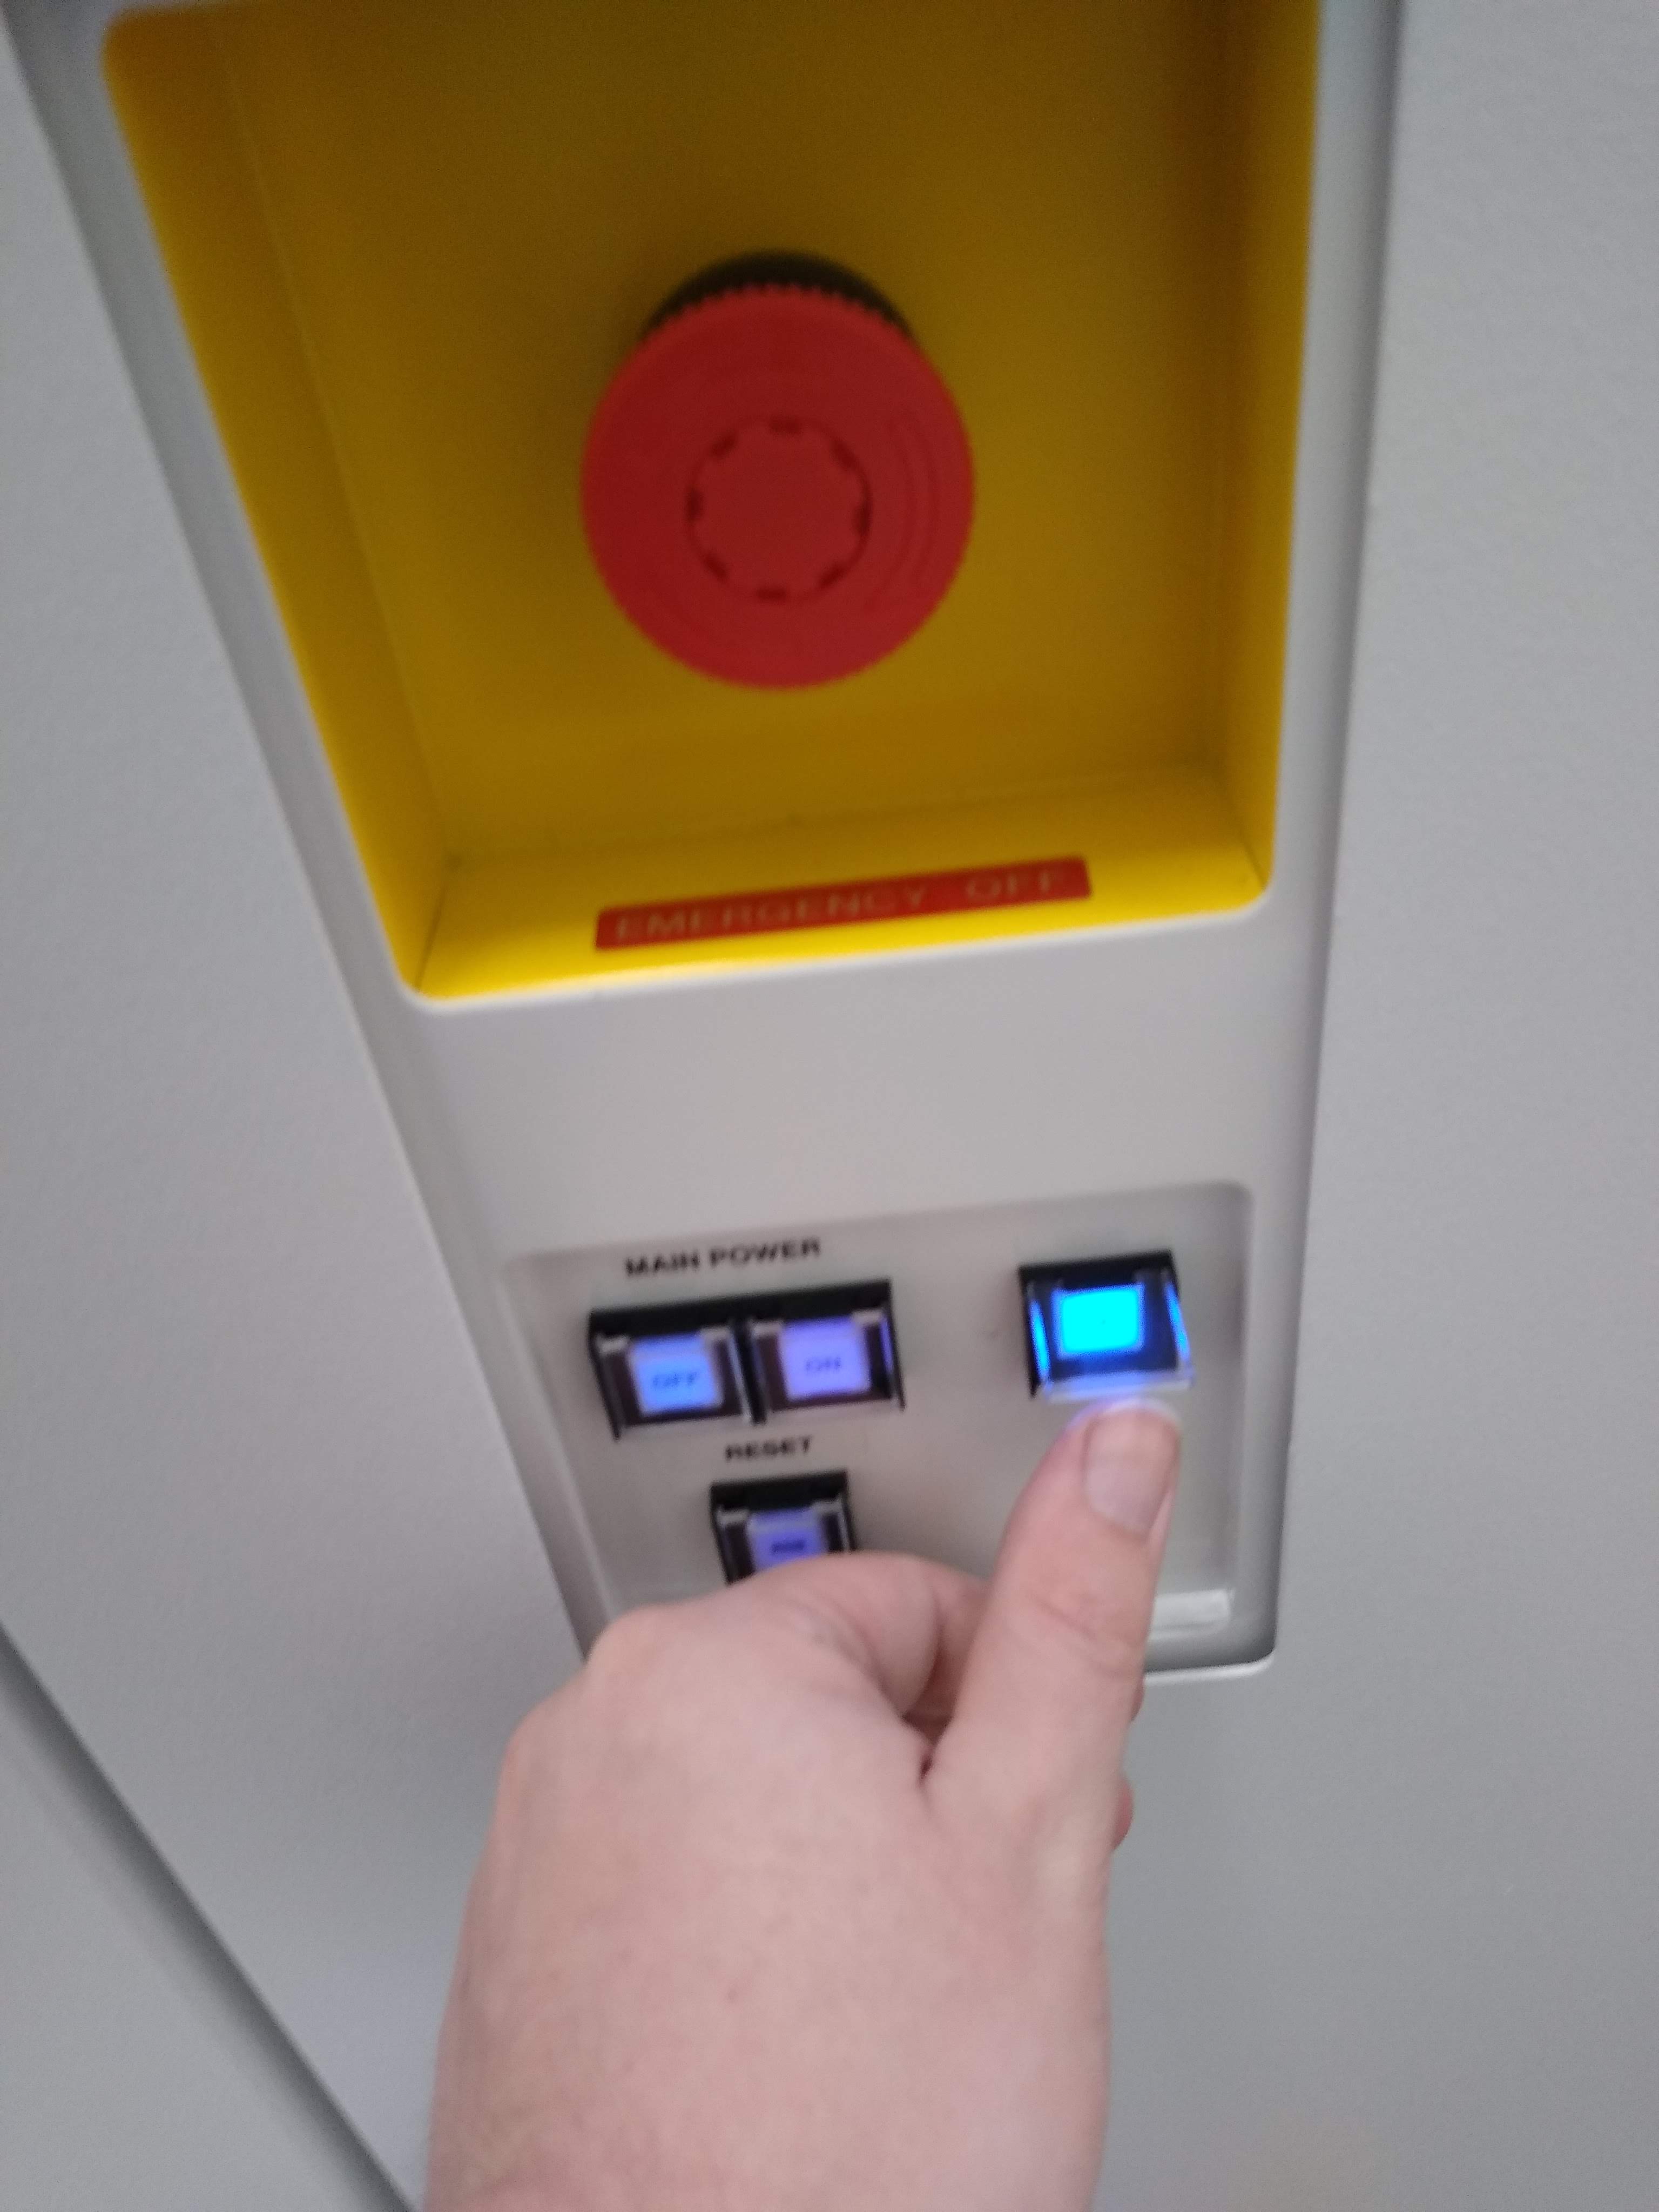
- After 5 second, push the button "Lens" again to switch the lenses on (Figure 2). The button will light blue.
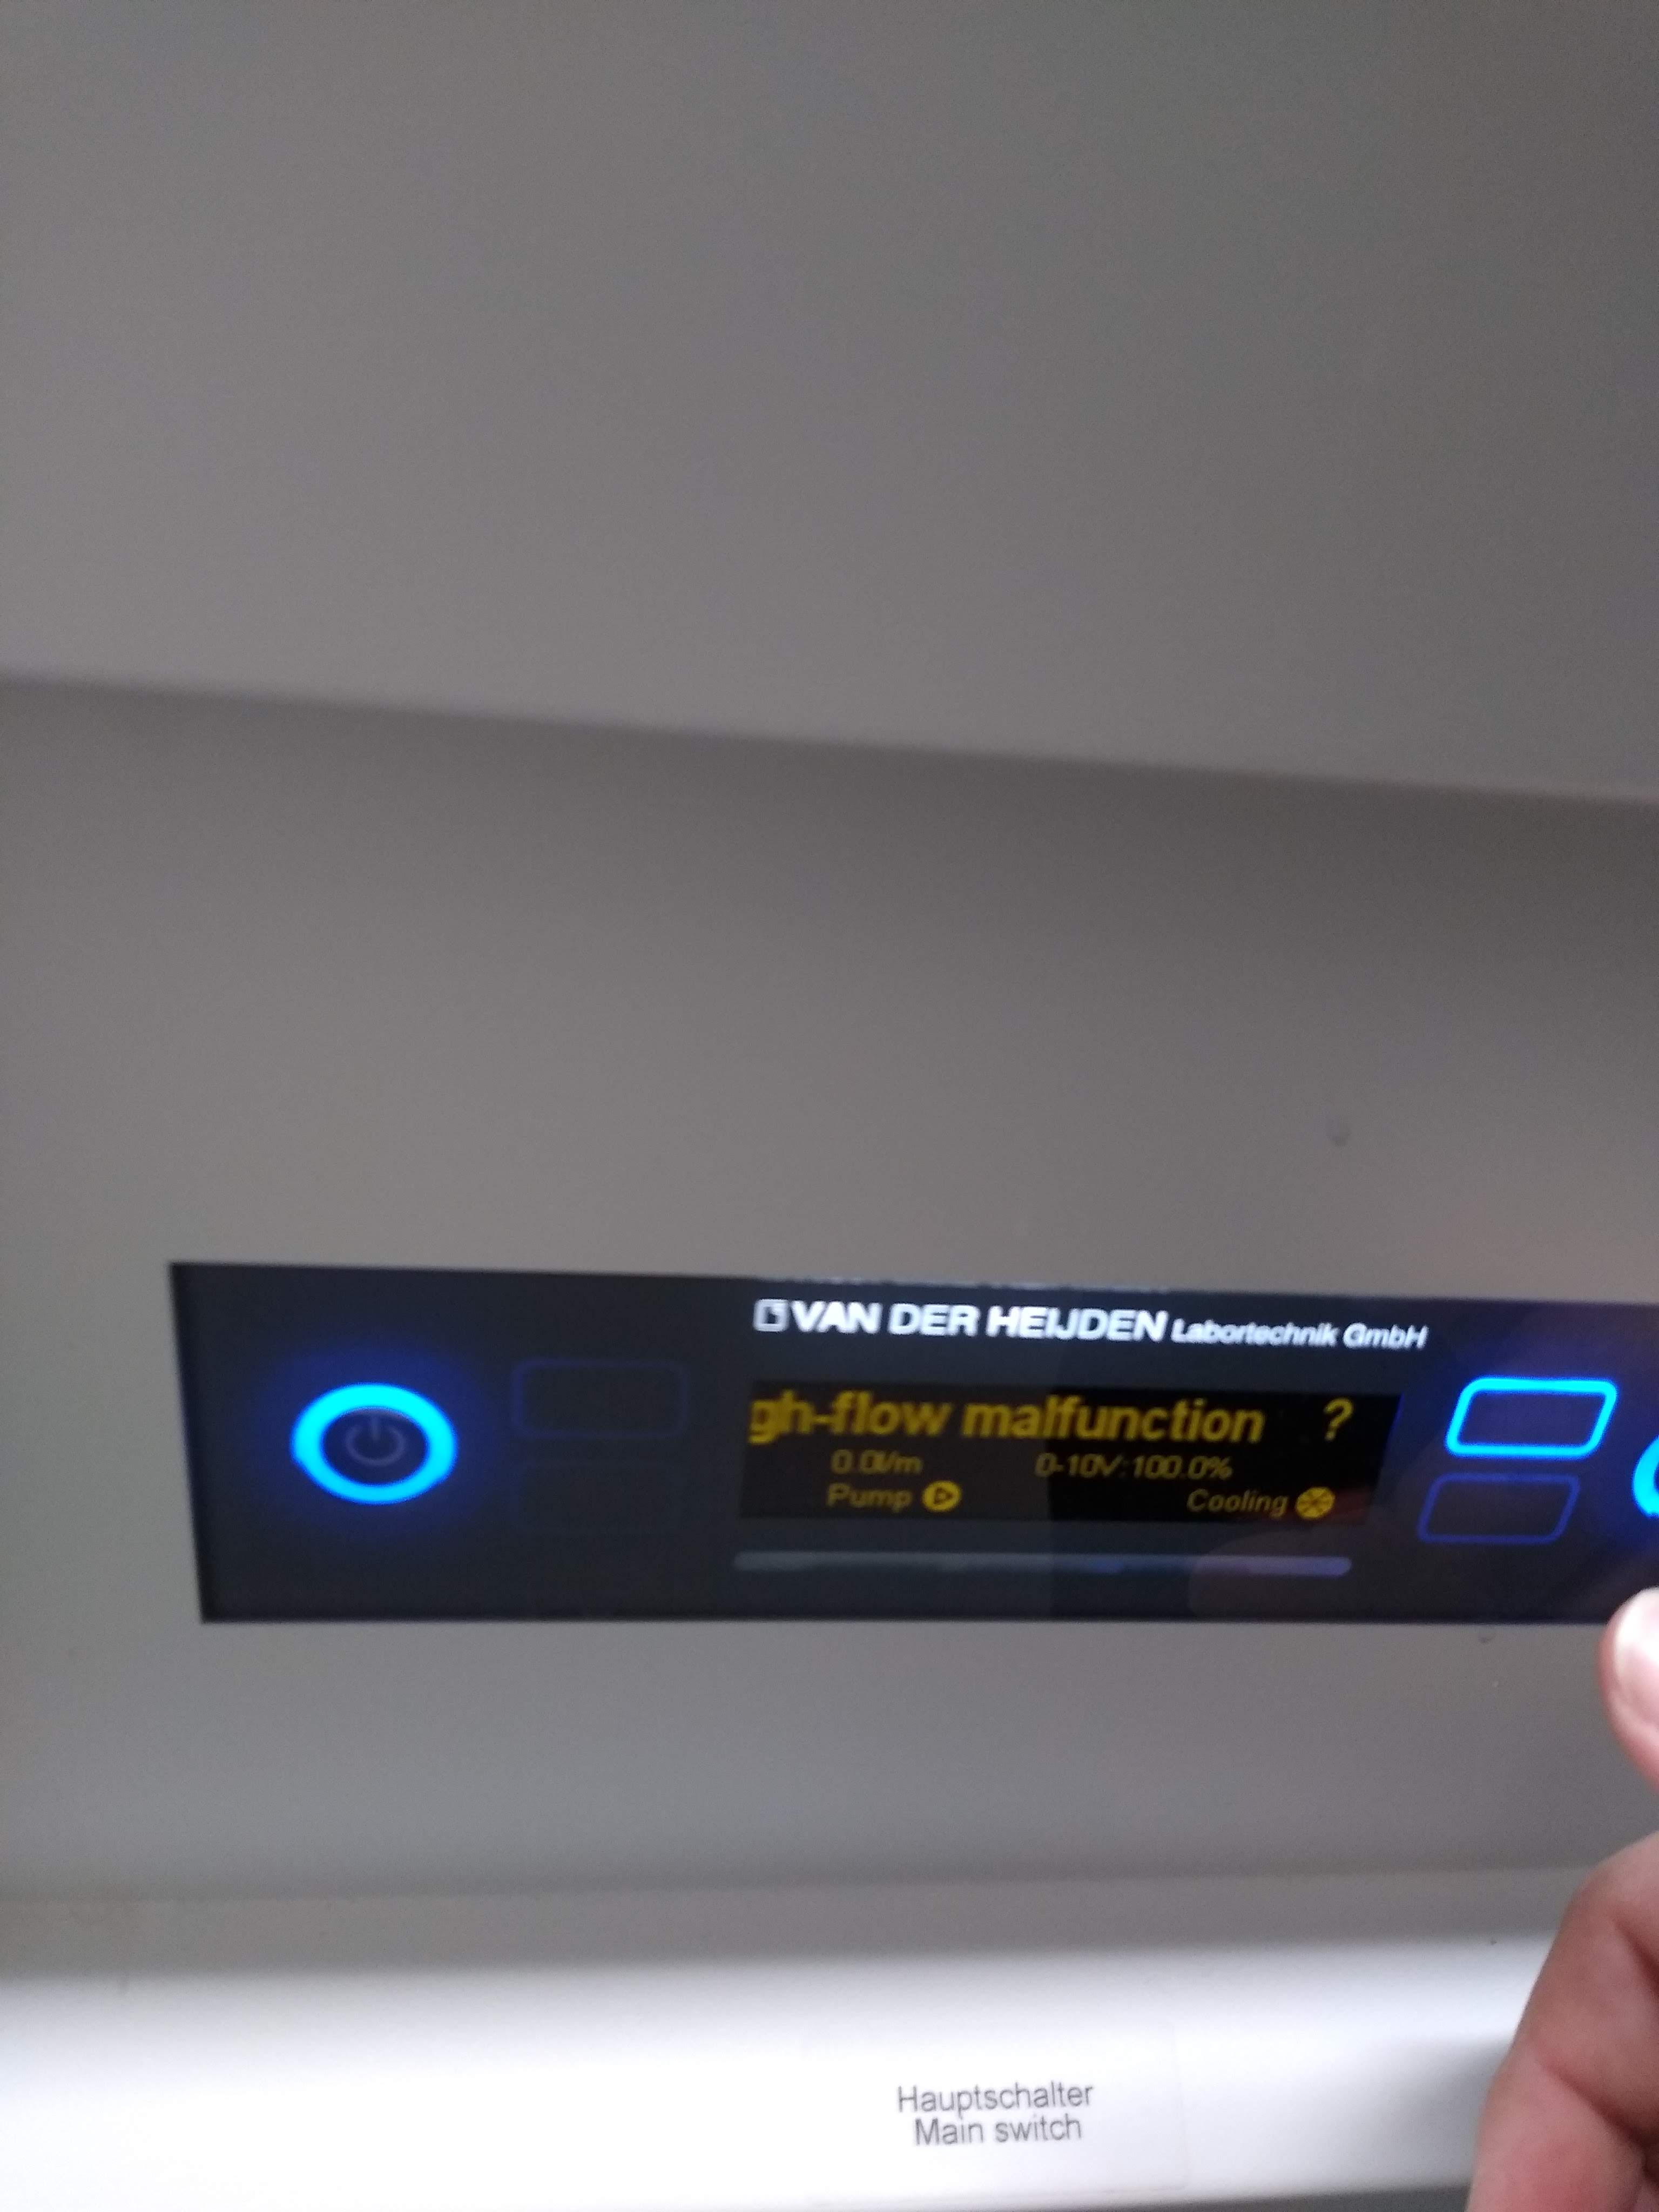
- Go in the technical room to the water-water chiller for the CryoARM (The one furthest in the back).
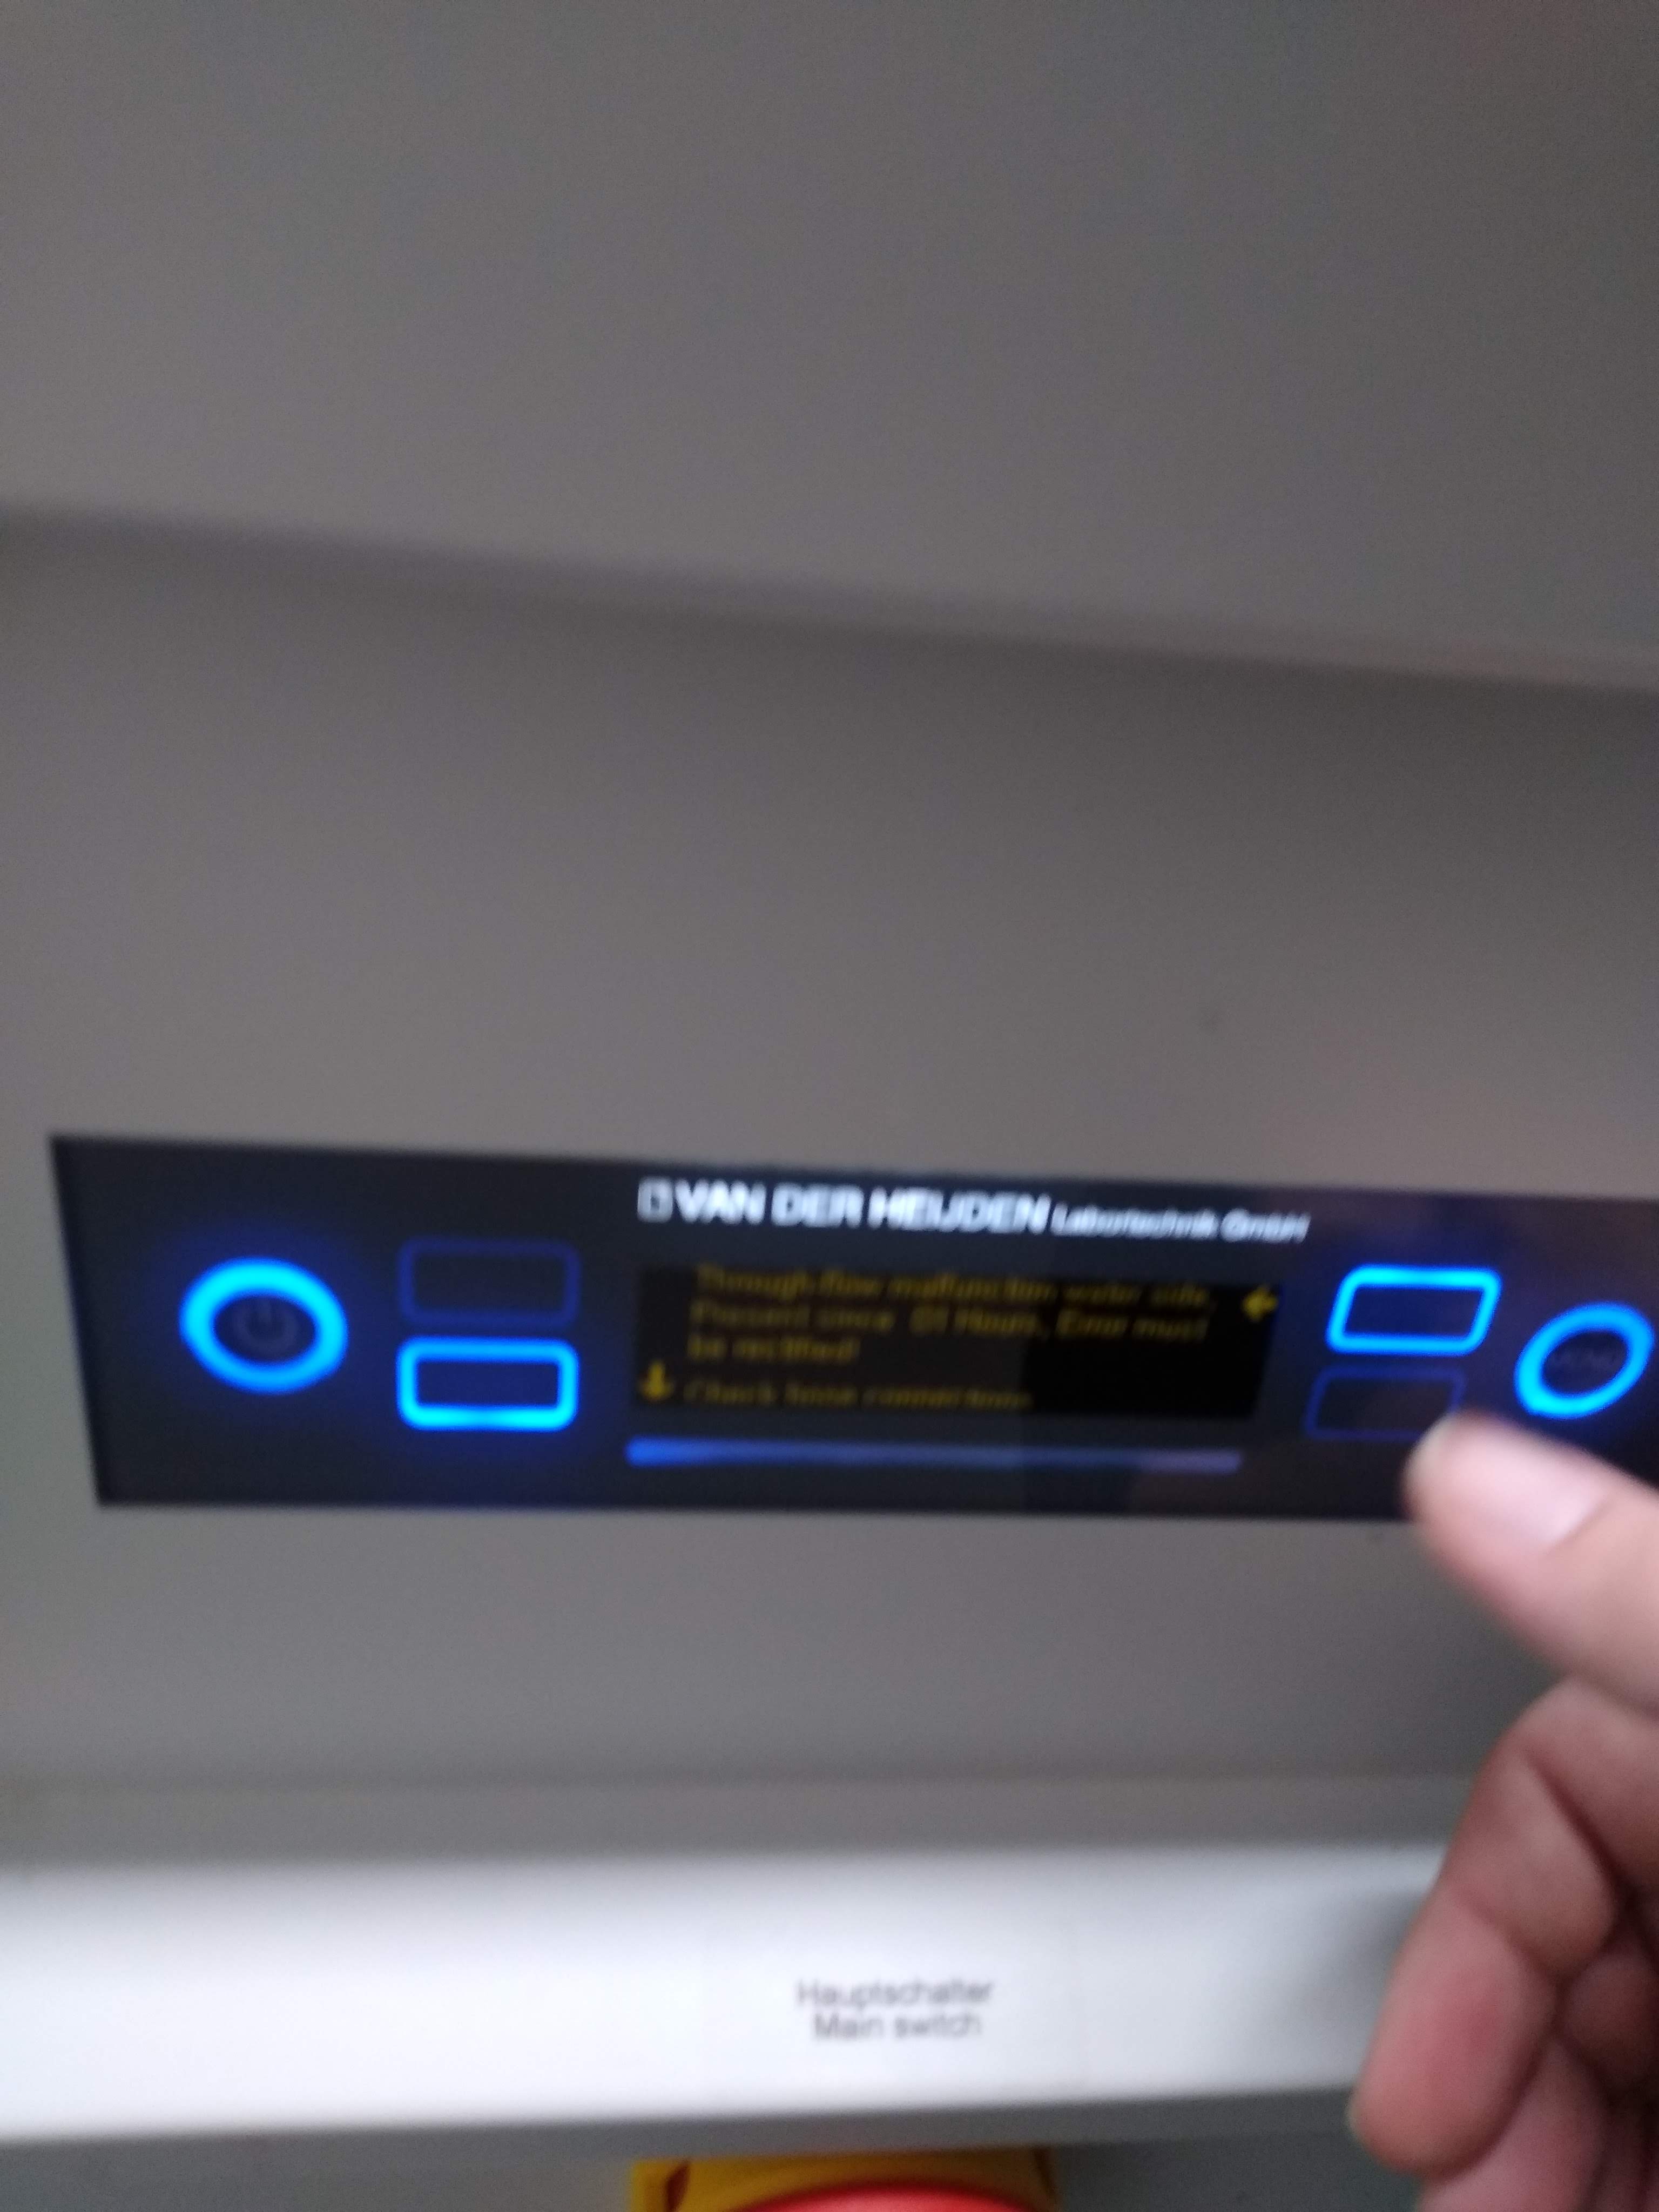
- The heads up display likely shows a through flow malfunction (Figure 3).
- Push the blue lit rectangular button on the top right of this display (Figure 3).
- The display will show a very long explanation text now (Figure 4)
- Push a few times the blue lit rectangular button on the bottom left of this display to scroll through the text (Figure 4).
- Once you reached the bottom, you can return to normal by pushing again the blue lit rectangular button on the top right of this display (Figure 5).
Complete microscope restart
This protocol is used when the whole CryoARM shut down.
Ideally you know why this happened and have fixed the problem. (I.e. water leak, current peak, vacuum leak etc.). Otherwise the scope will shut down hard again.
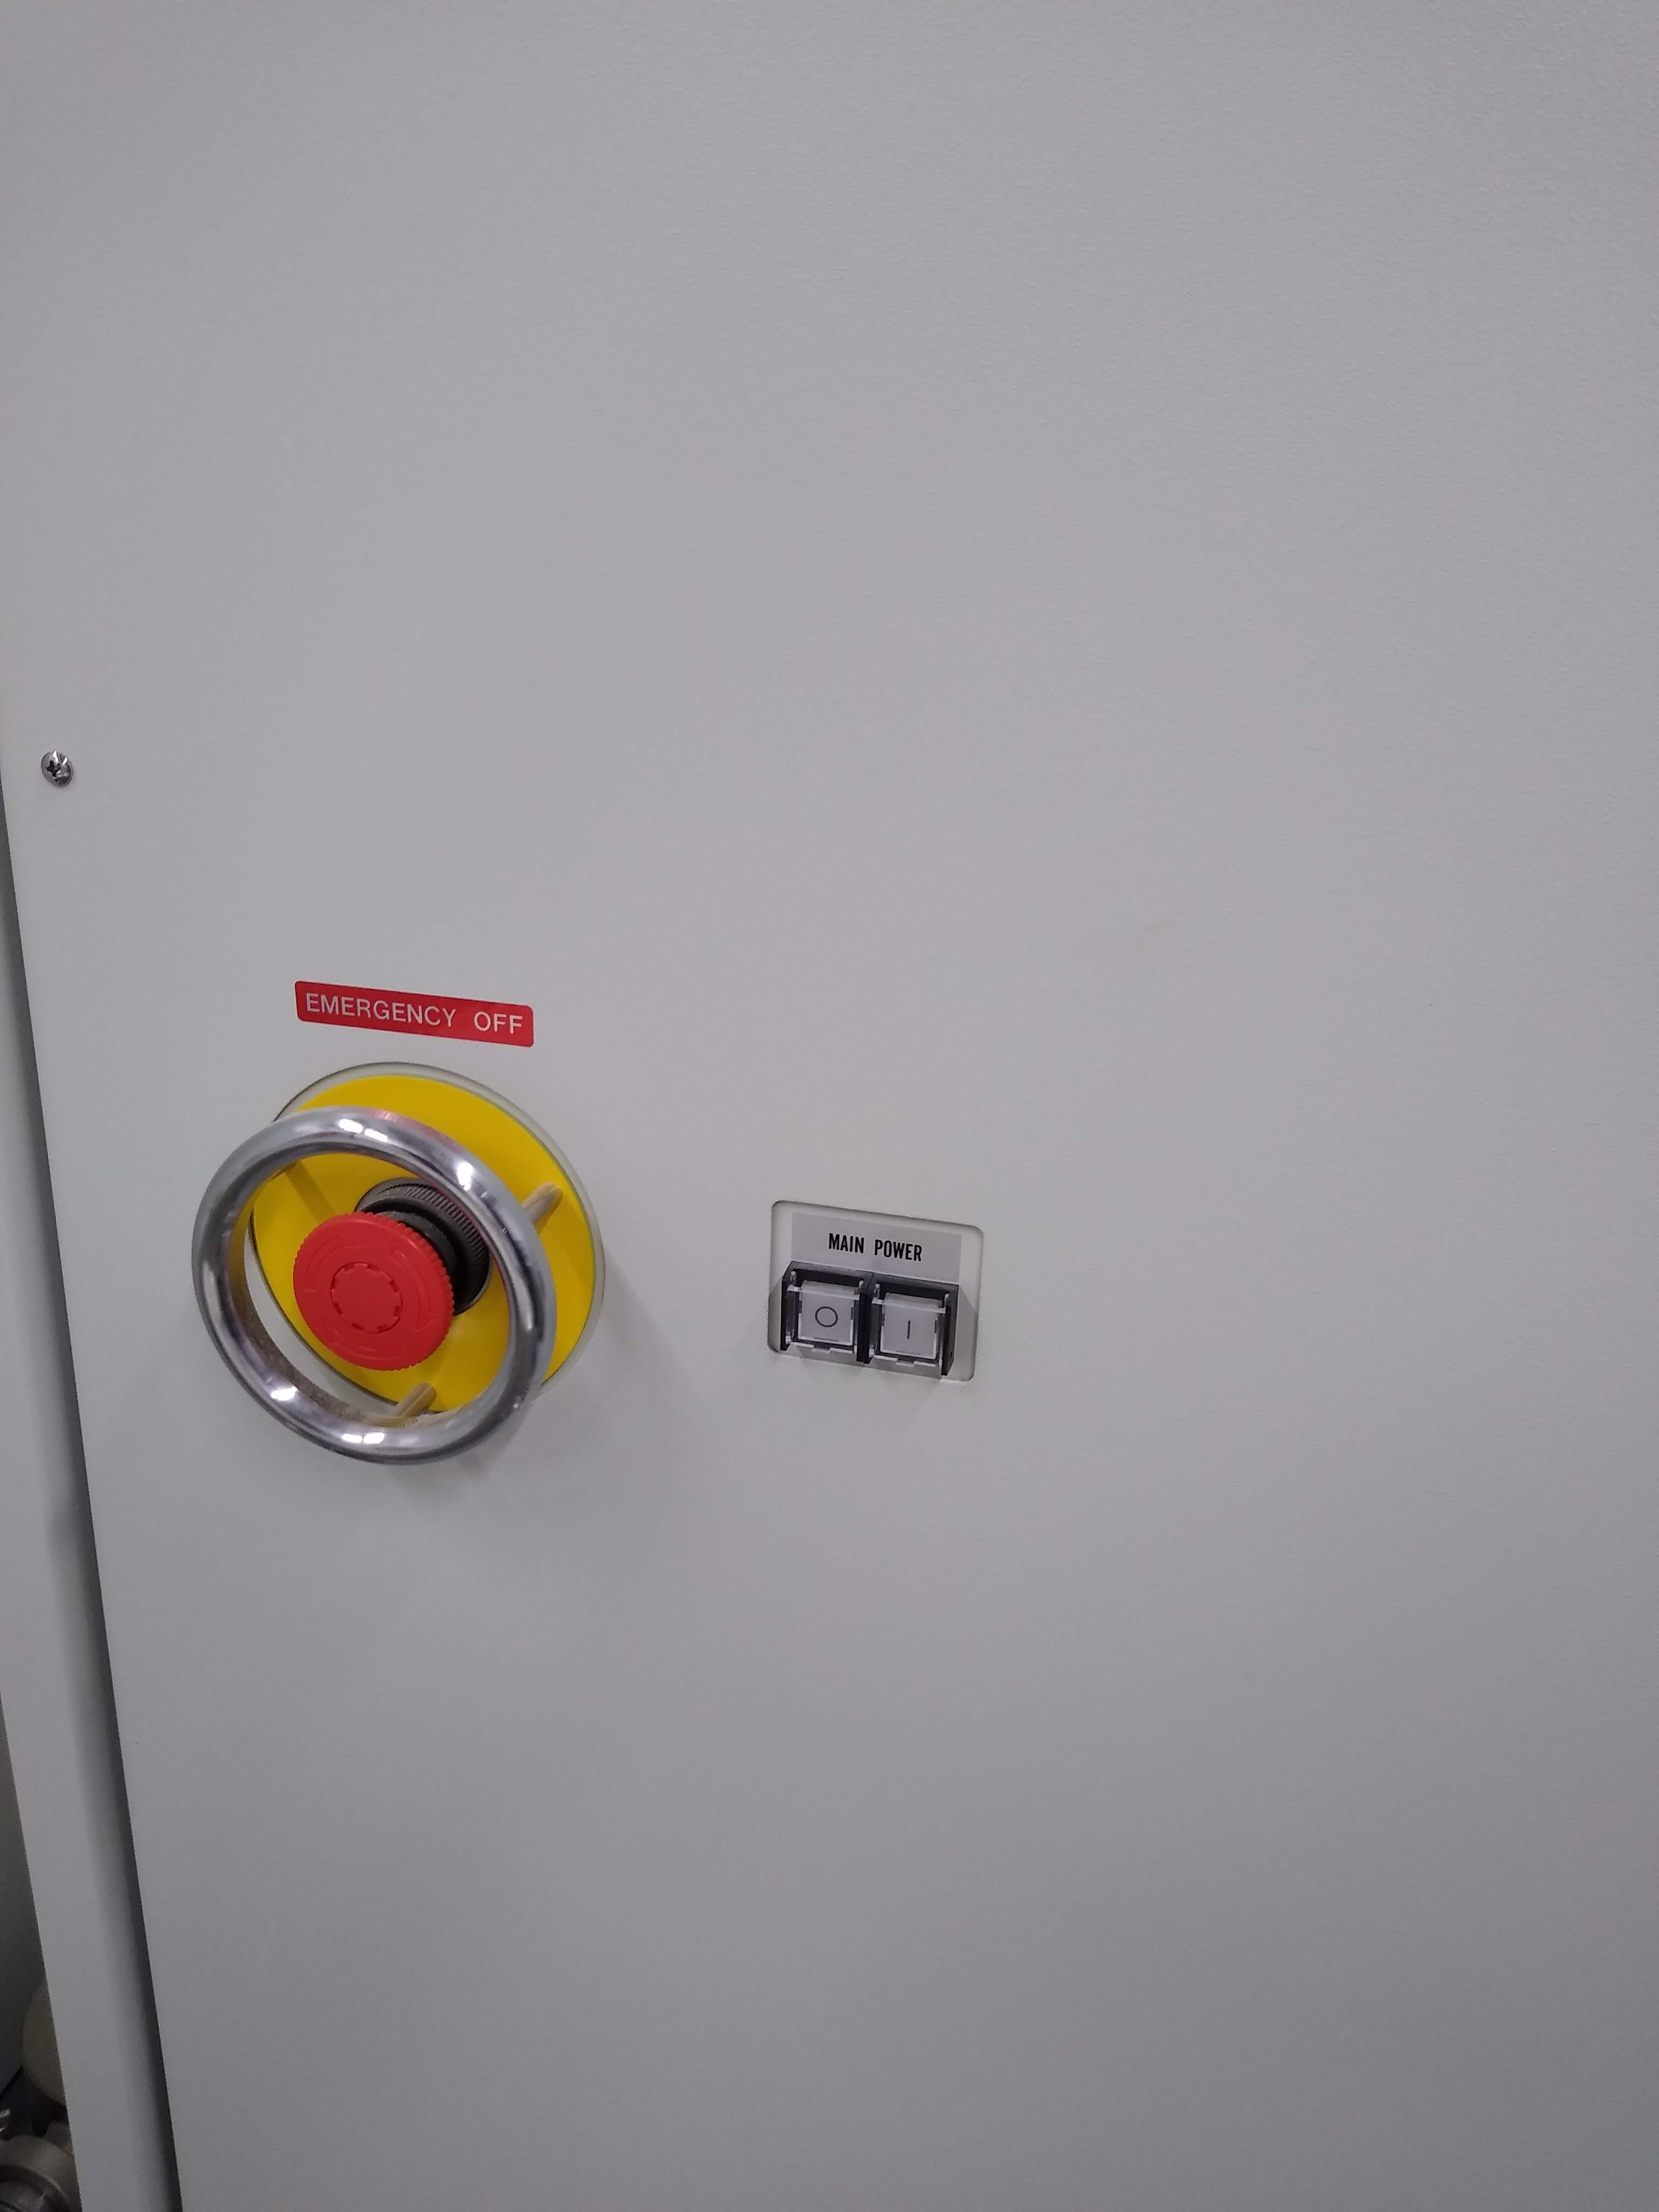
- In the technical room go to the most right console and press (for safety) the Main Power off (O) button.
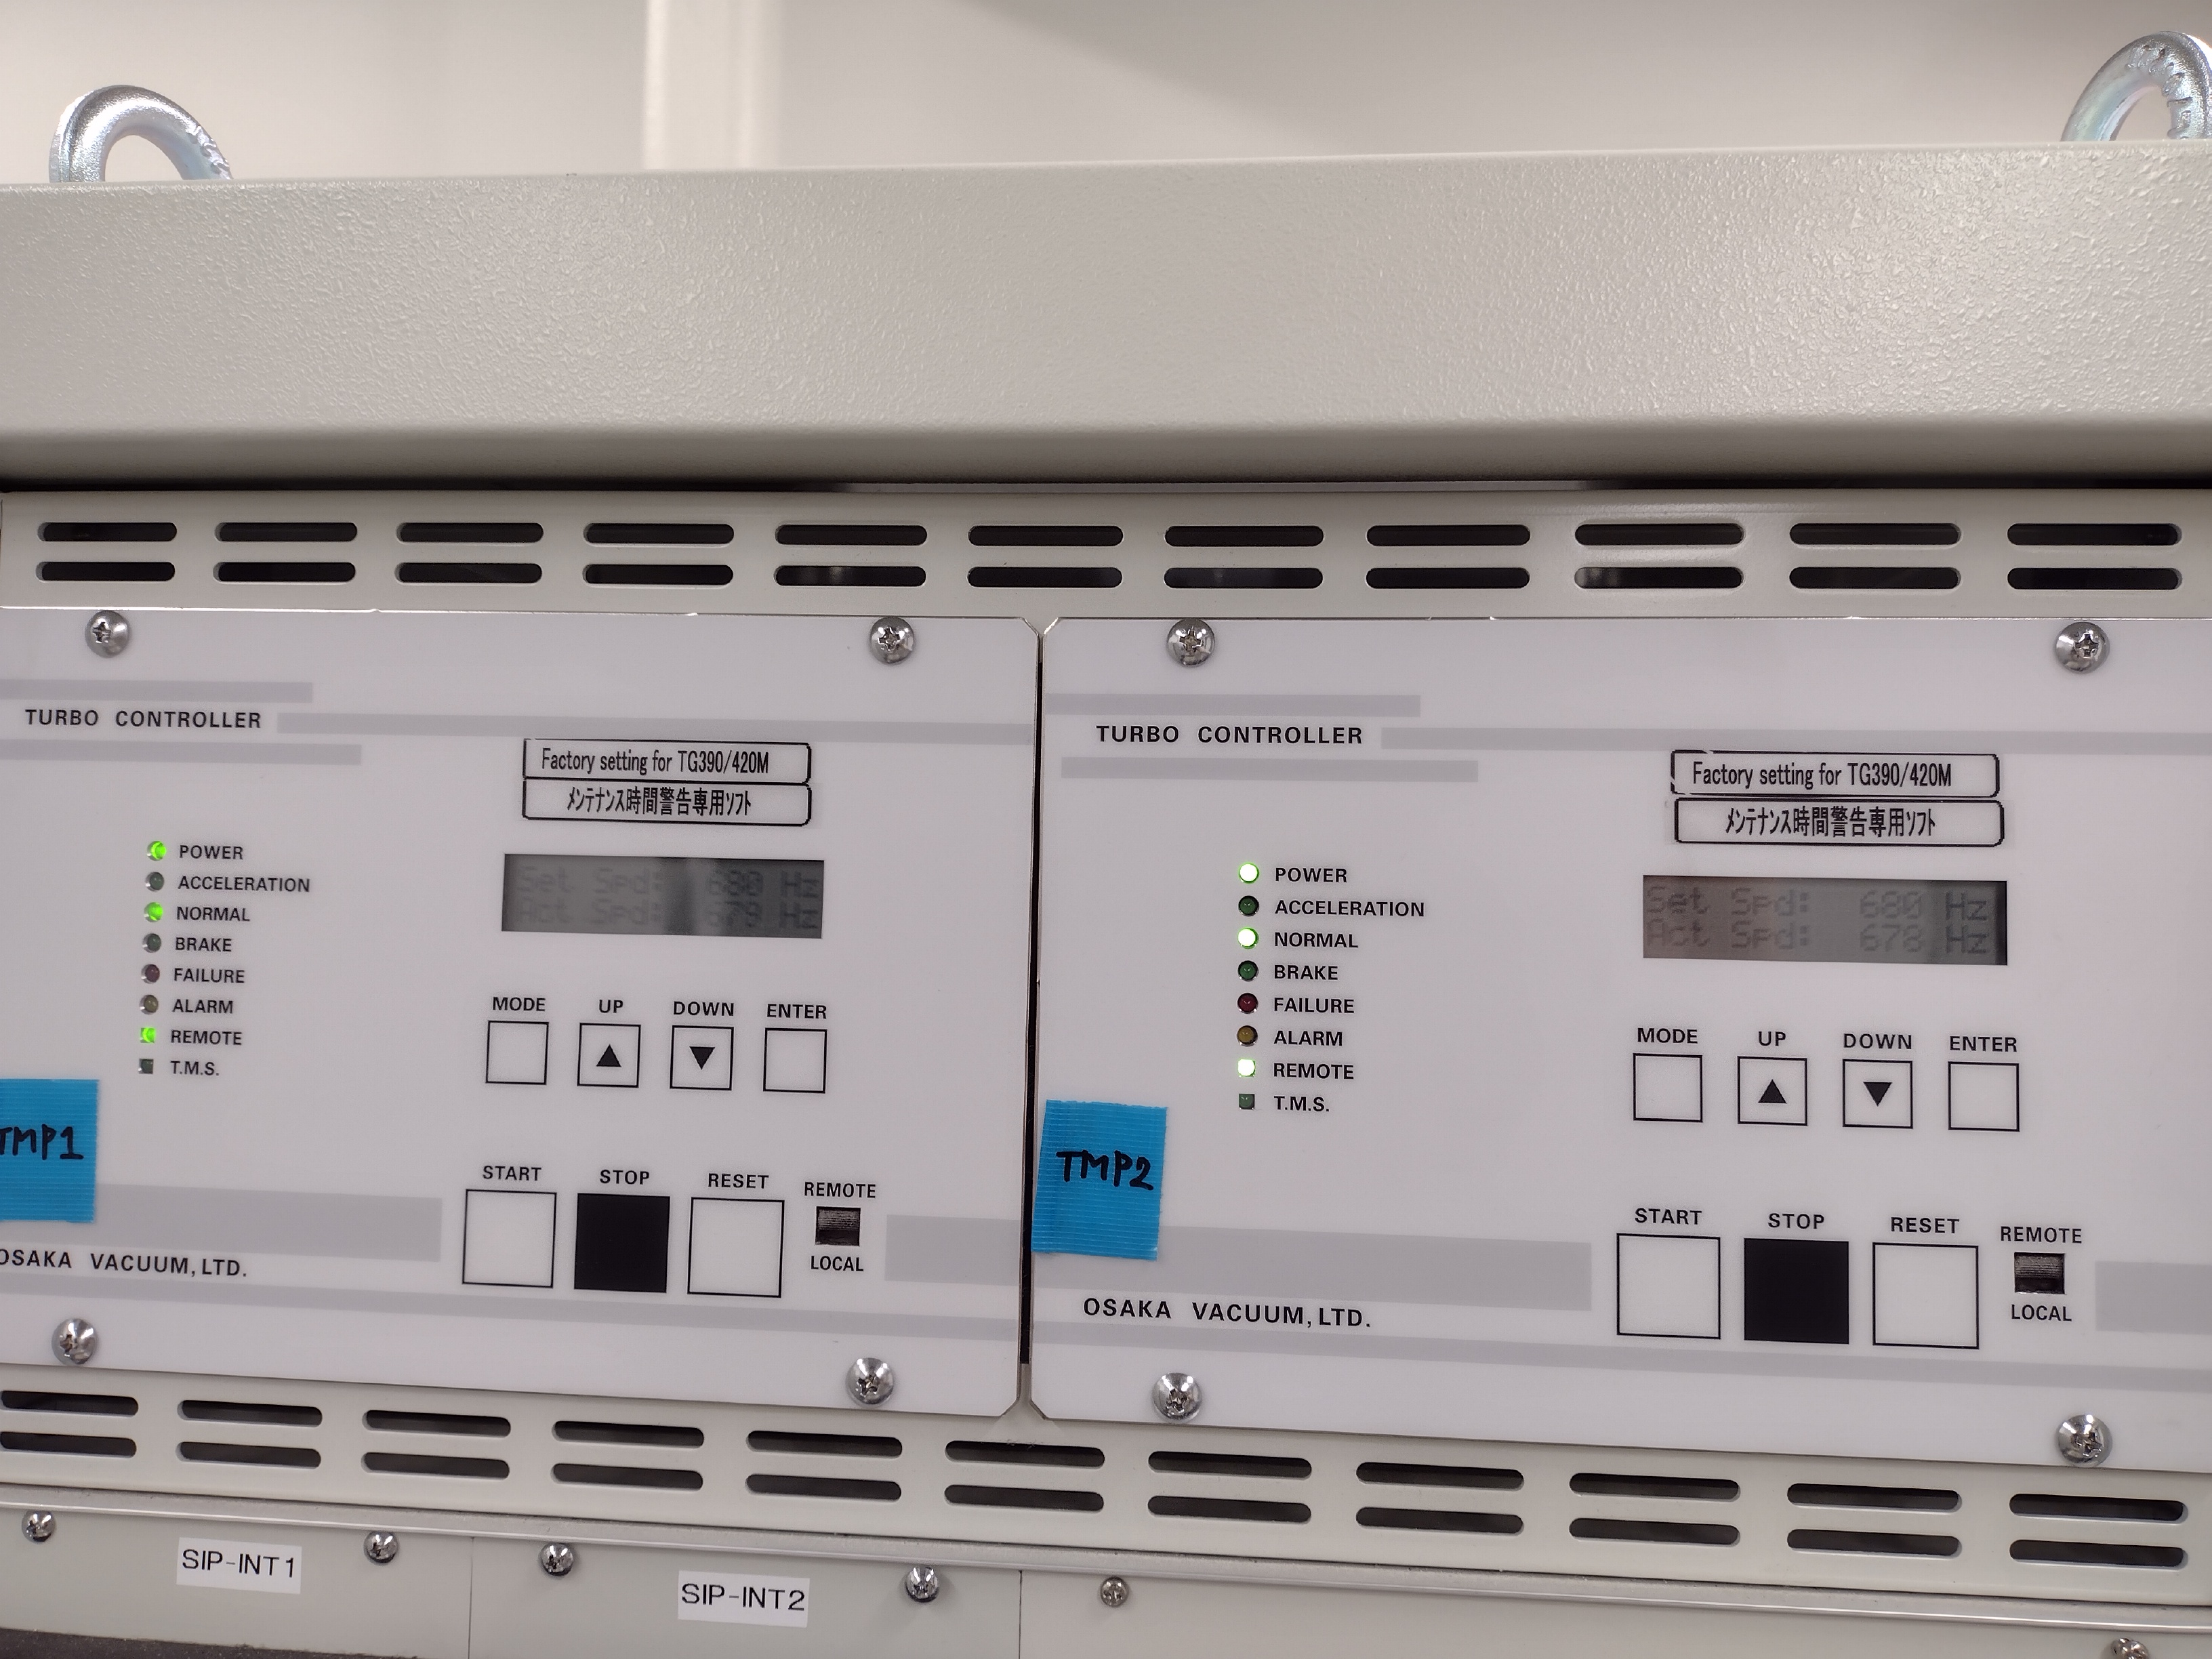
- Ensure that the turbo pumps stopped rotating. Their speed is displayed on the same console in the upper panel (Figure 2).
- Check on the back side of the console. Probably the circuit breaker switched to off. Toggle it back to on (Figure 3).

- On the front of the console switch on the main power (I). The button will light up green (Figure 4).

- Go back to the CryoARM and on its right side keep the "ON" button in the "Main Power" section pushed until you hear the Scroll pump starting (Figure 5).
- Back in the technical room go to the most left console in the back of the room and switch on the Microscope PC (Figure 6).
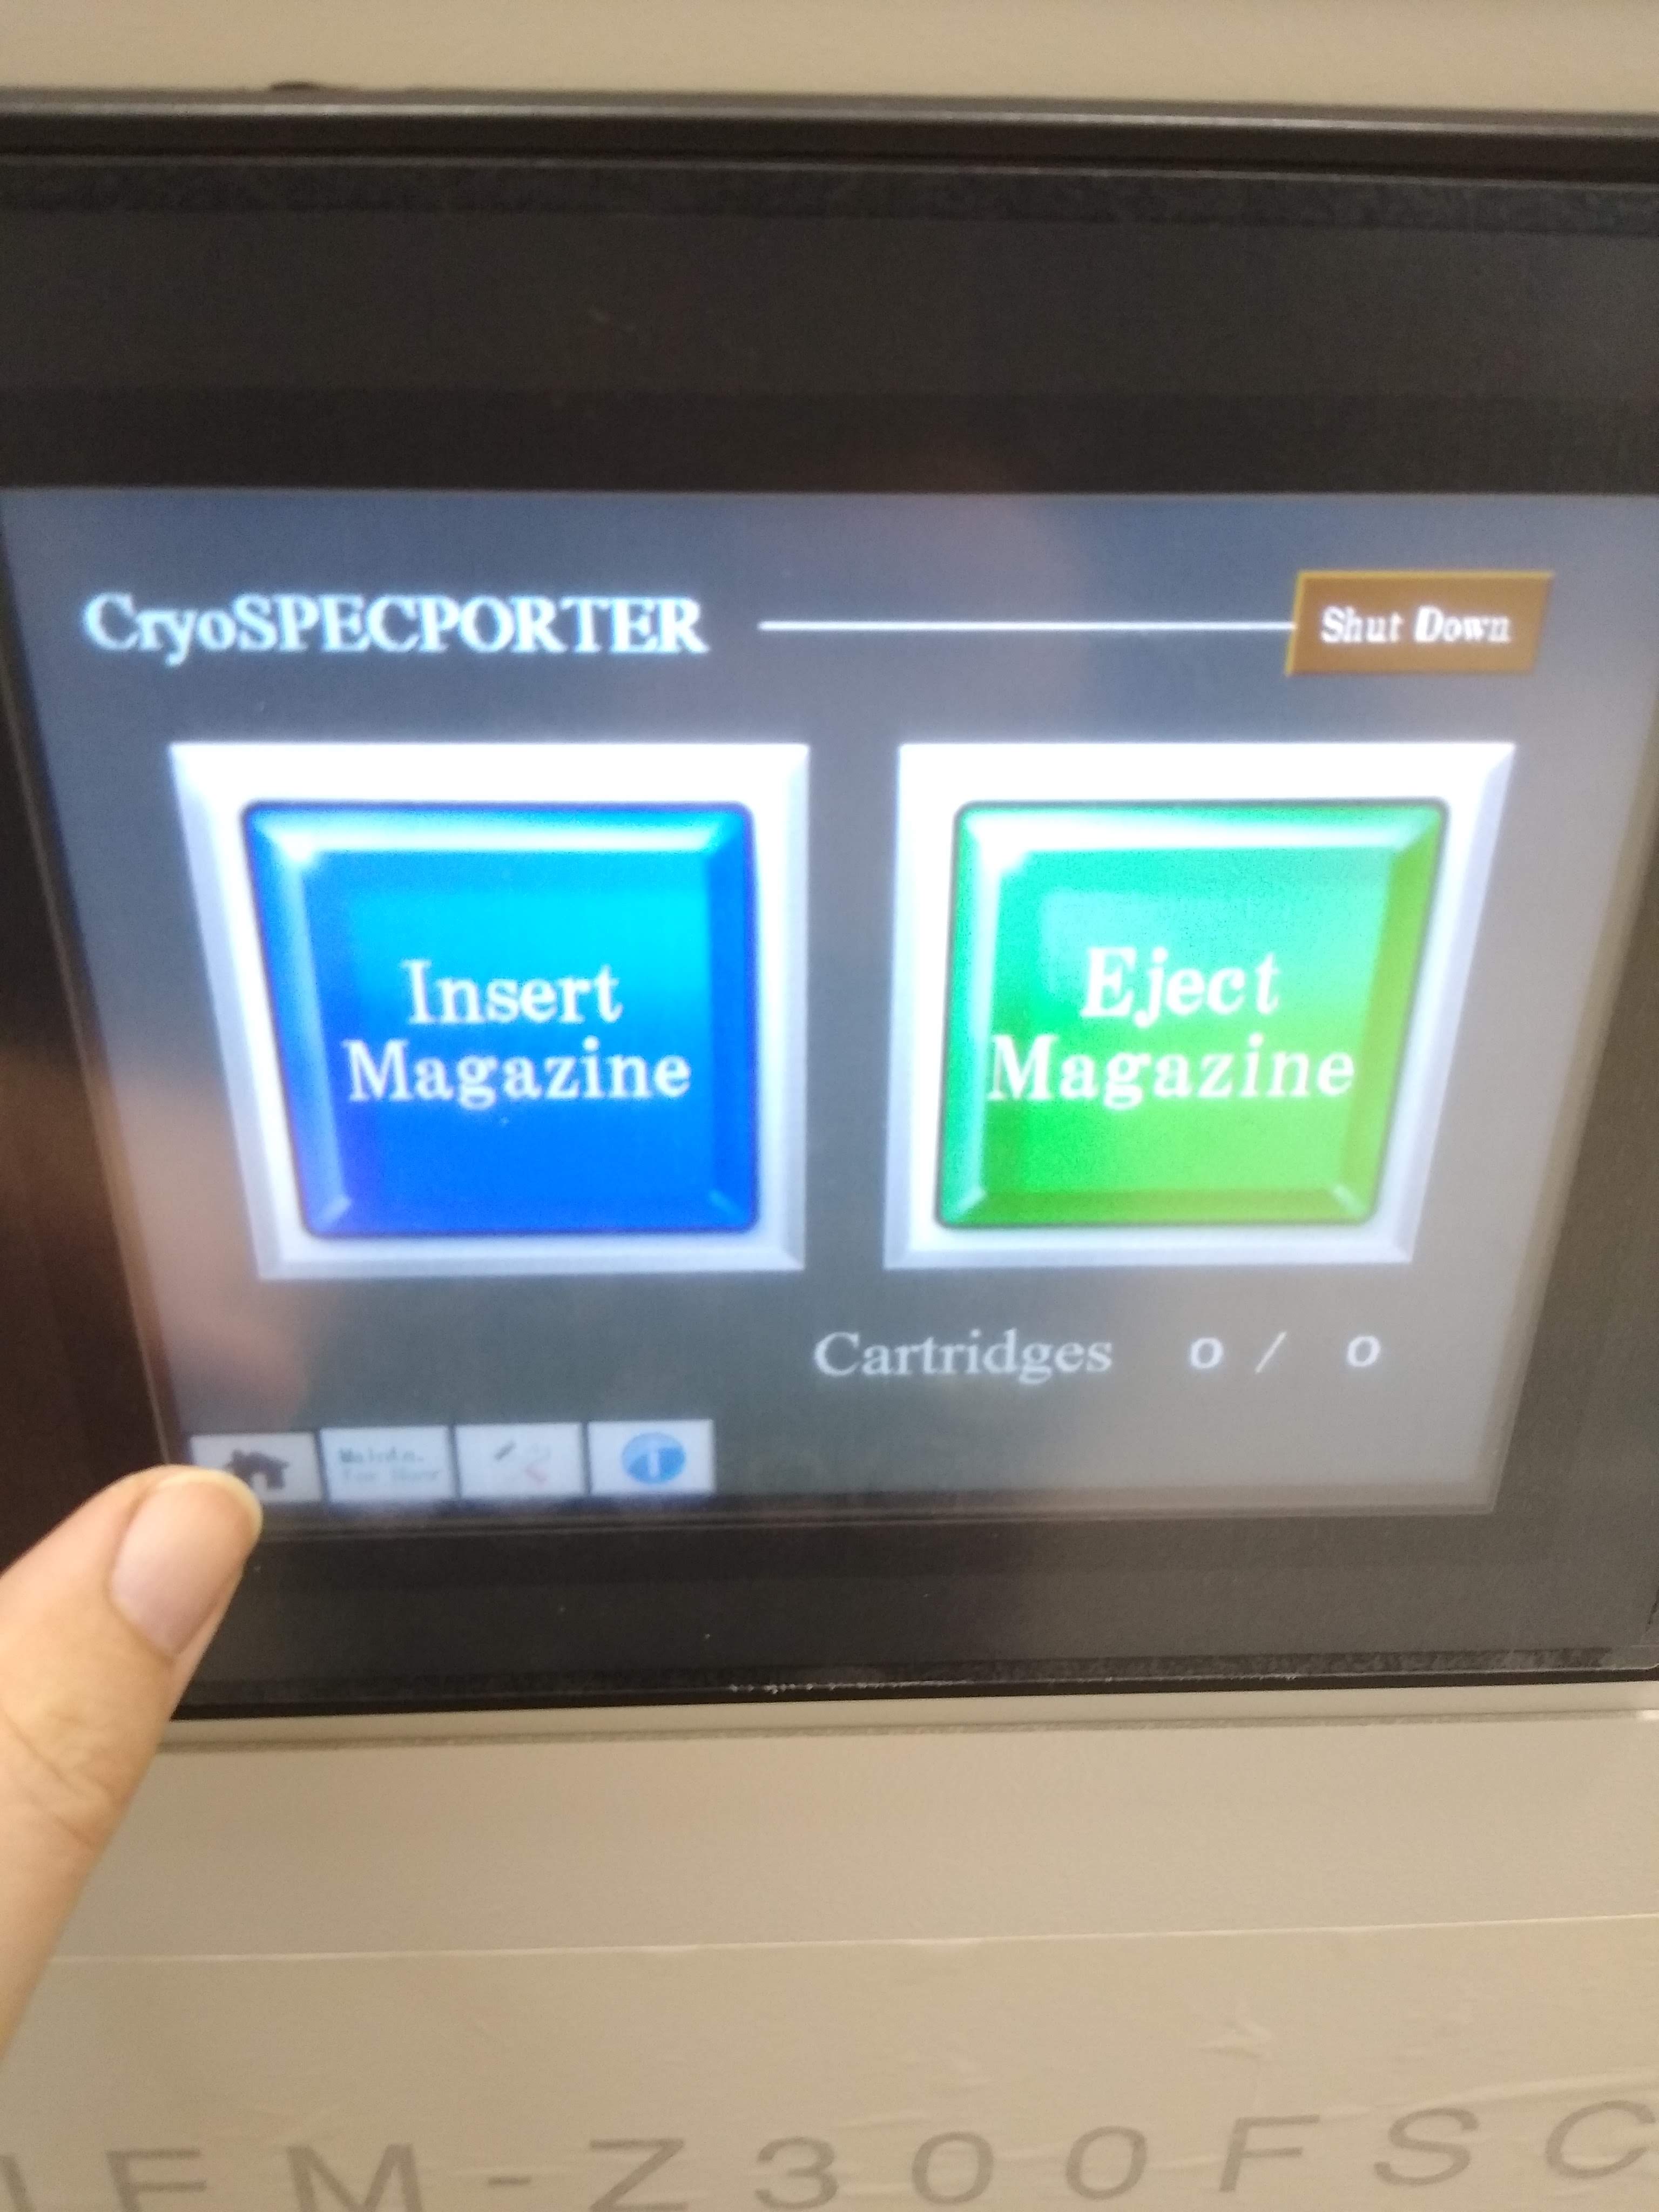
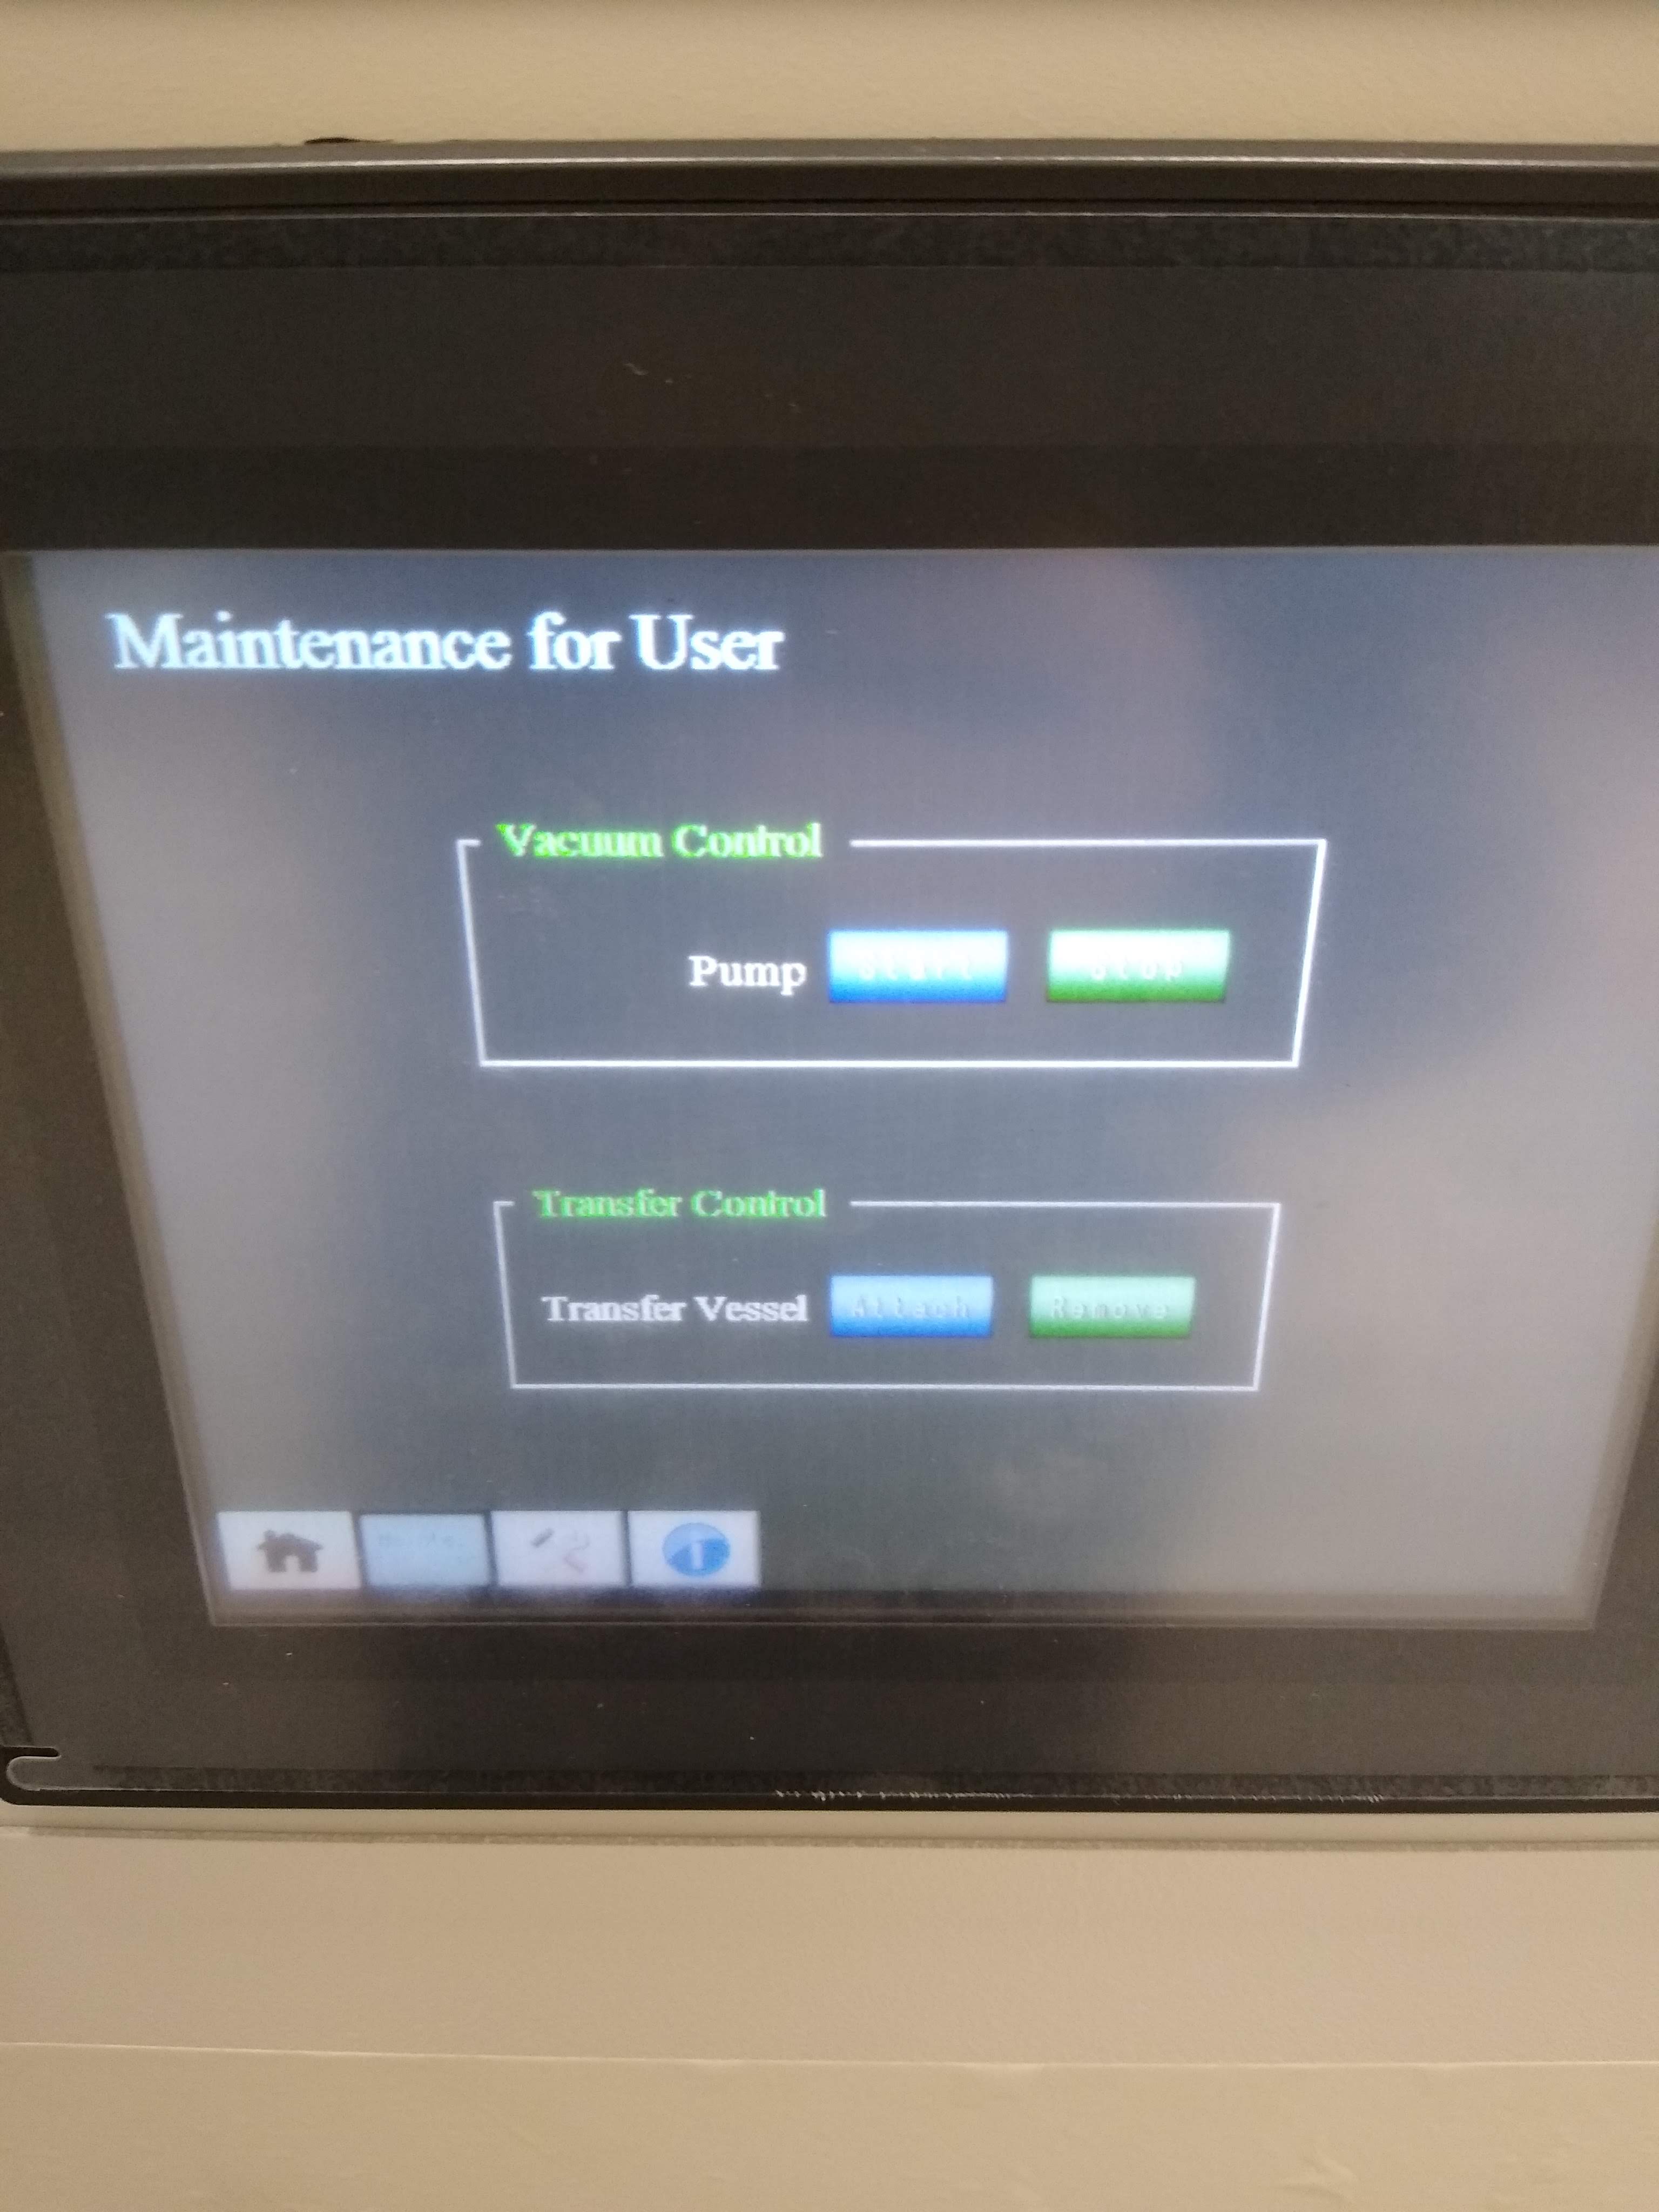
- Back at the CryoARM on its front is a touch screen panel (Toward the right). Touch it to wake it up. Go to "Maintenance for User" (Figure 7).
- Under "Vacuum Control" and "Pump" click "start" (Figure 8).
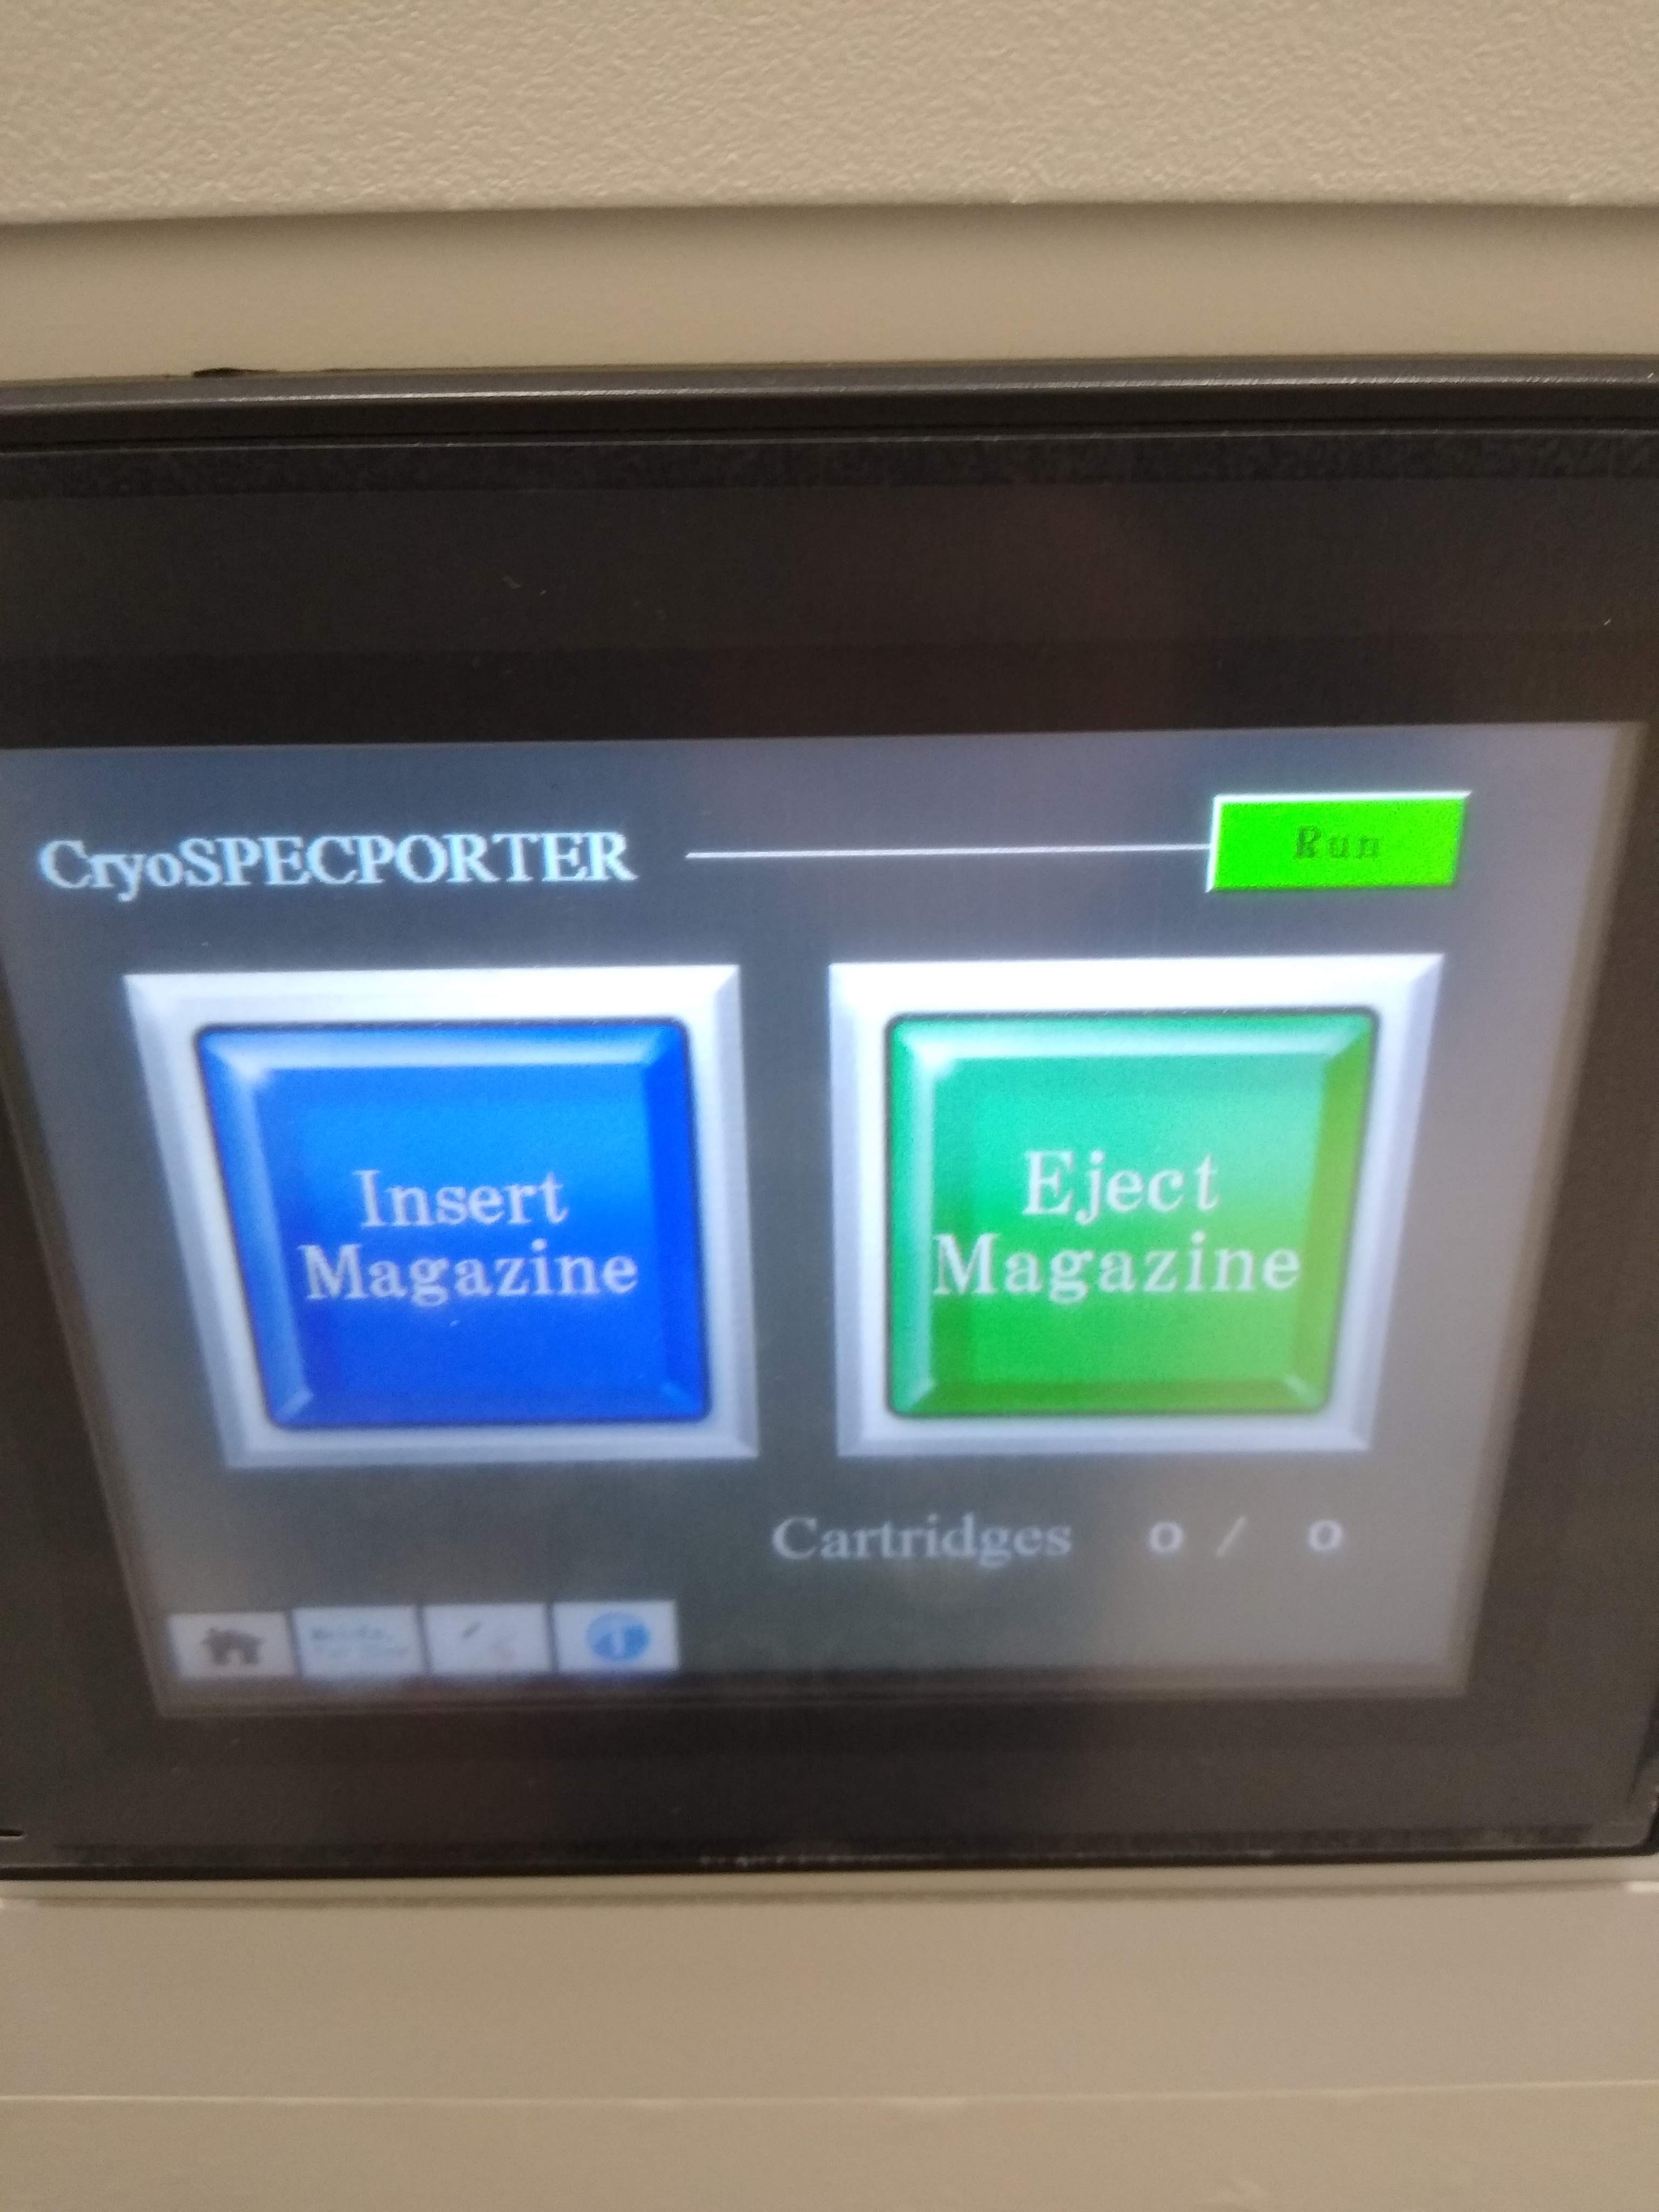
- Going back to the home screen ("house icon" bottom left corner), the cryoSpecporter indicator goes green and says "RUN" (Figure 9).
- On the right side of the CryoARM, push the button "Lens" to switch the lenses off properly (Figure 10). The lens button should not be lit up anymore.
- After 3 second, push the button "Lens" again to switch the lenses on (Figure 11). The button will light blue.
- Go in the technical room to the water-water chiller for the CryoARM (The one furthest in the back).
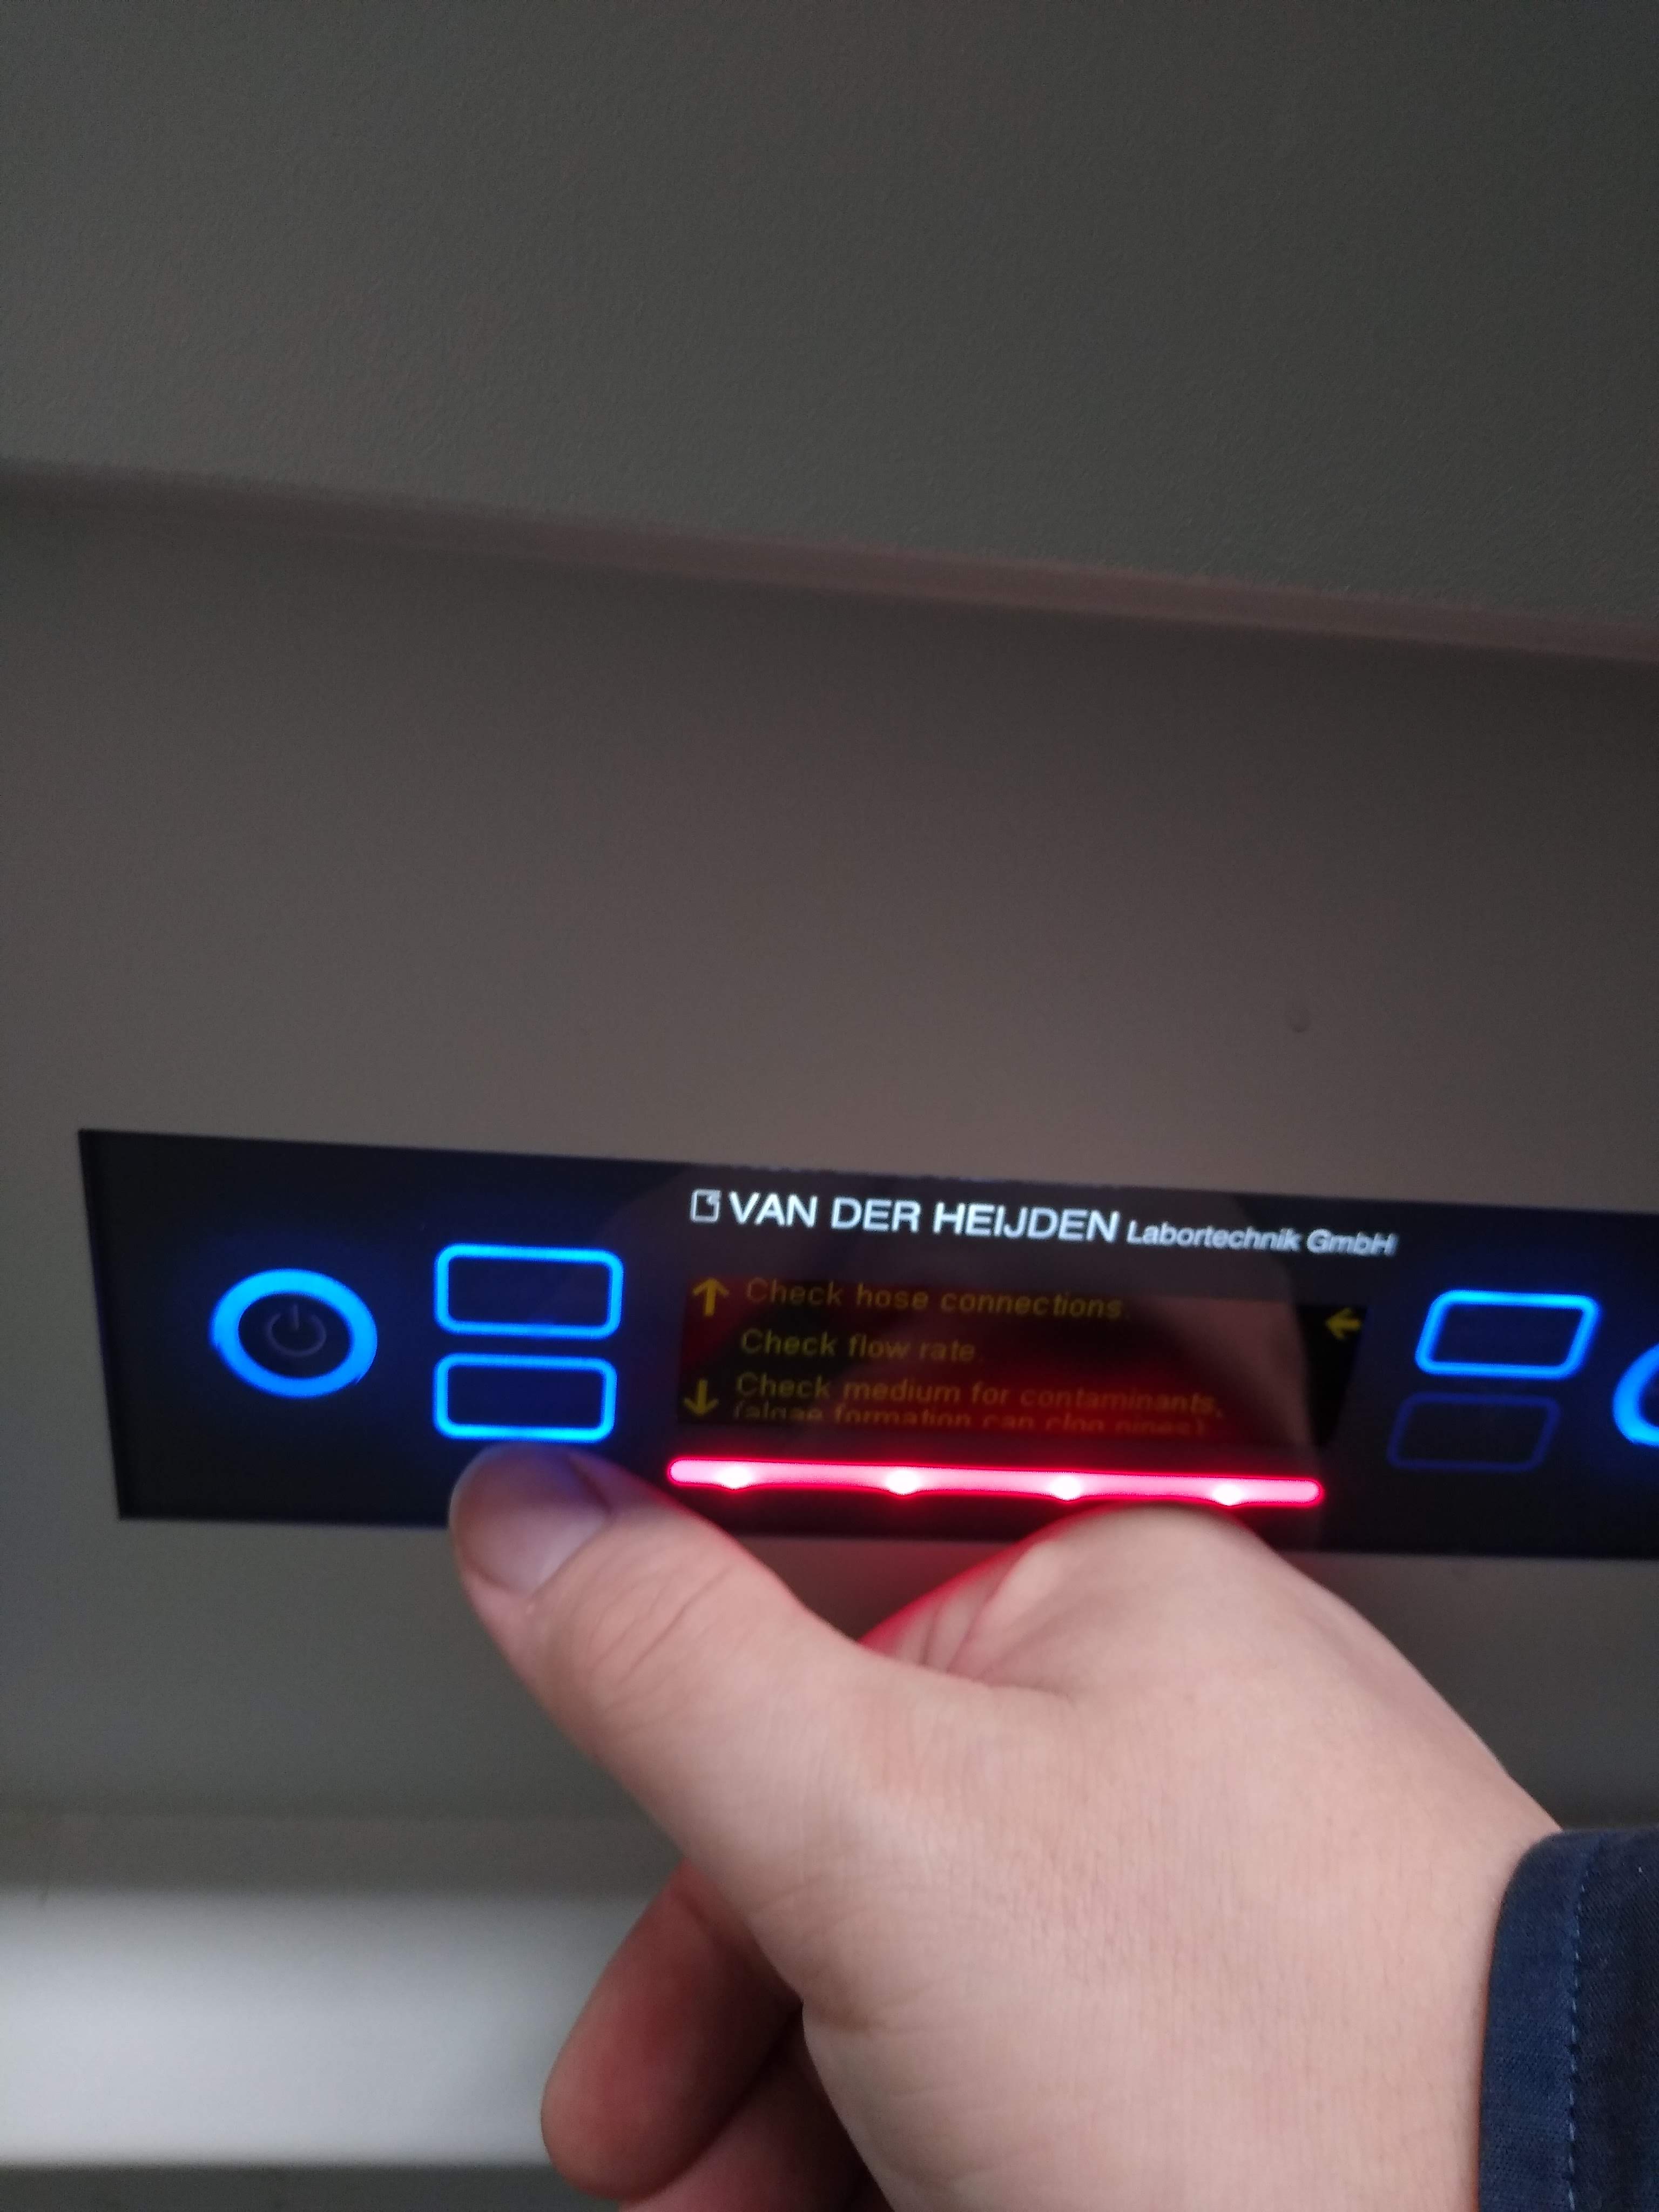
- The heads up displayshows an error and the red line is blinking (Figure 12).
- Push the blue lit rectangular button on the top right of this display (Figure 12).
- The display will show a very long explanation text now (Figure 13)
- Push a few times the blue lit rectangular button on the bottom left of this display to scroll through the text (Figure 13).
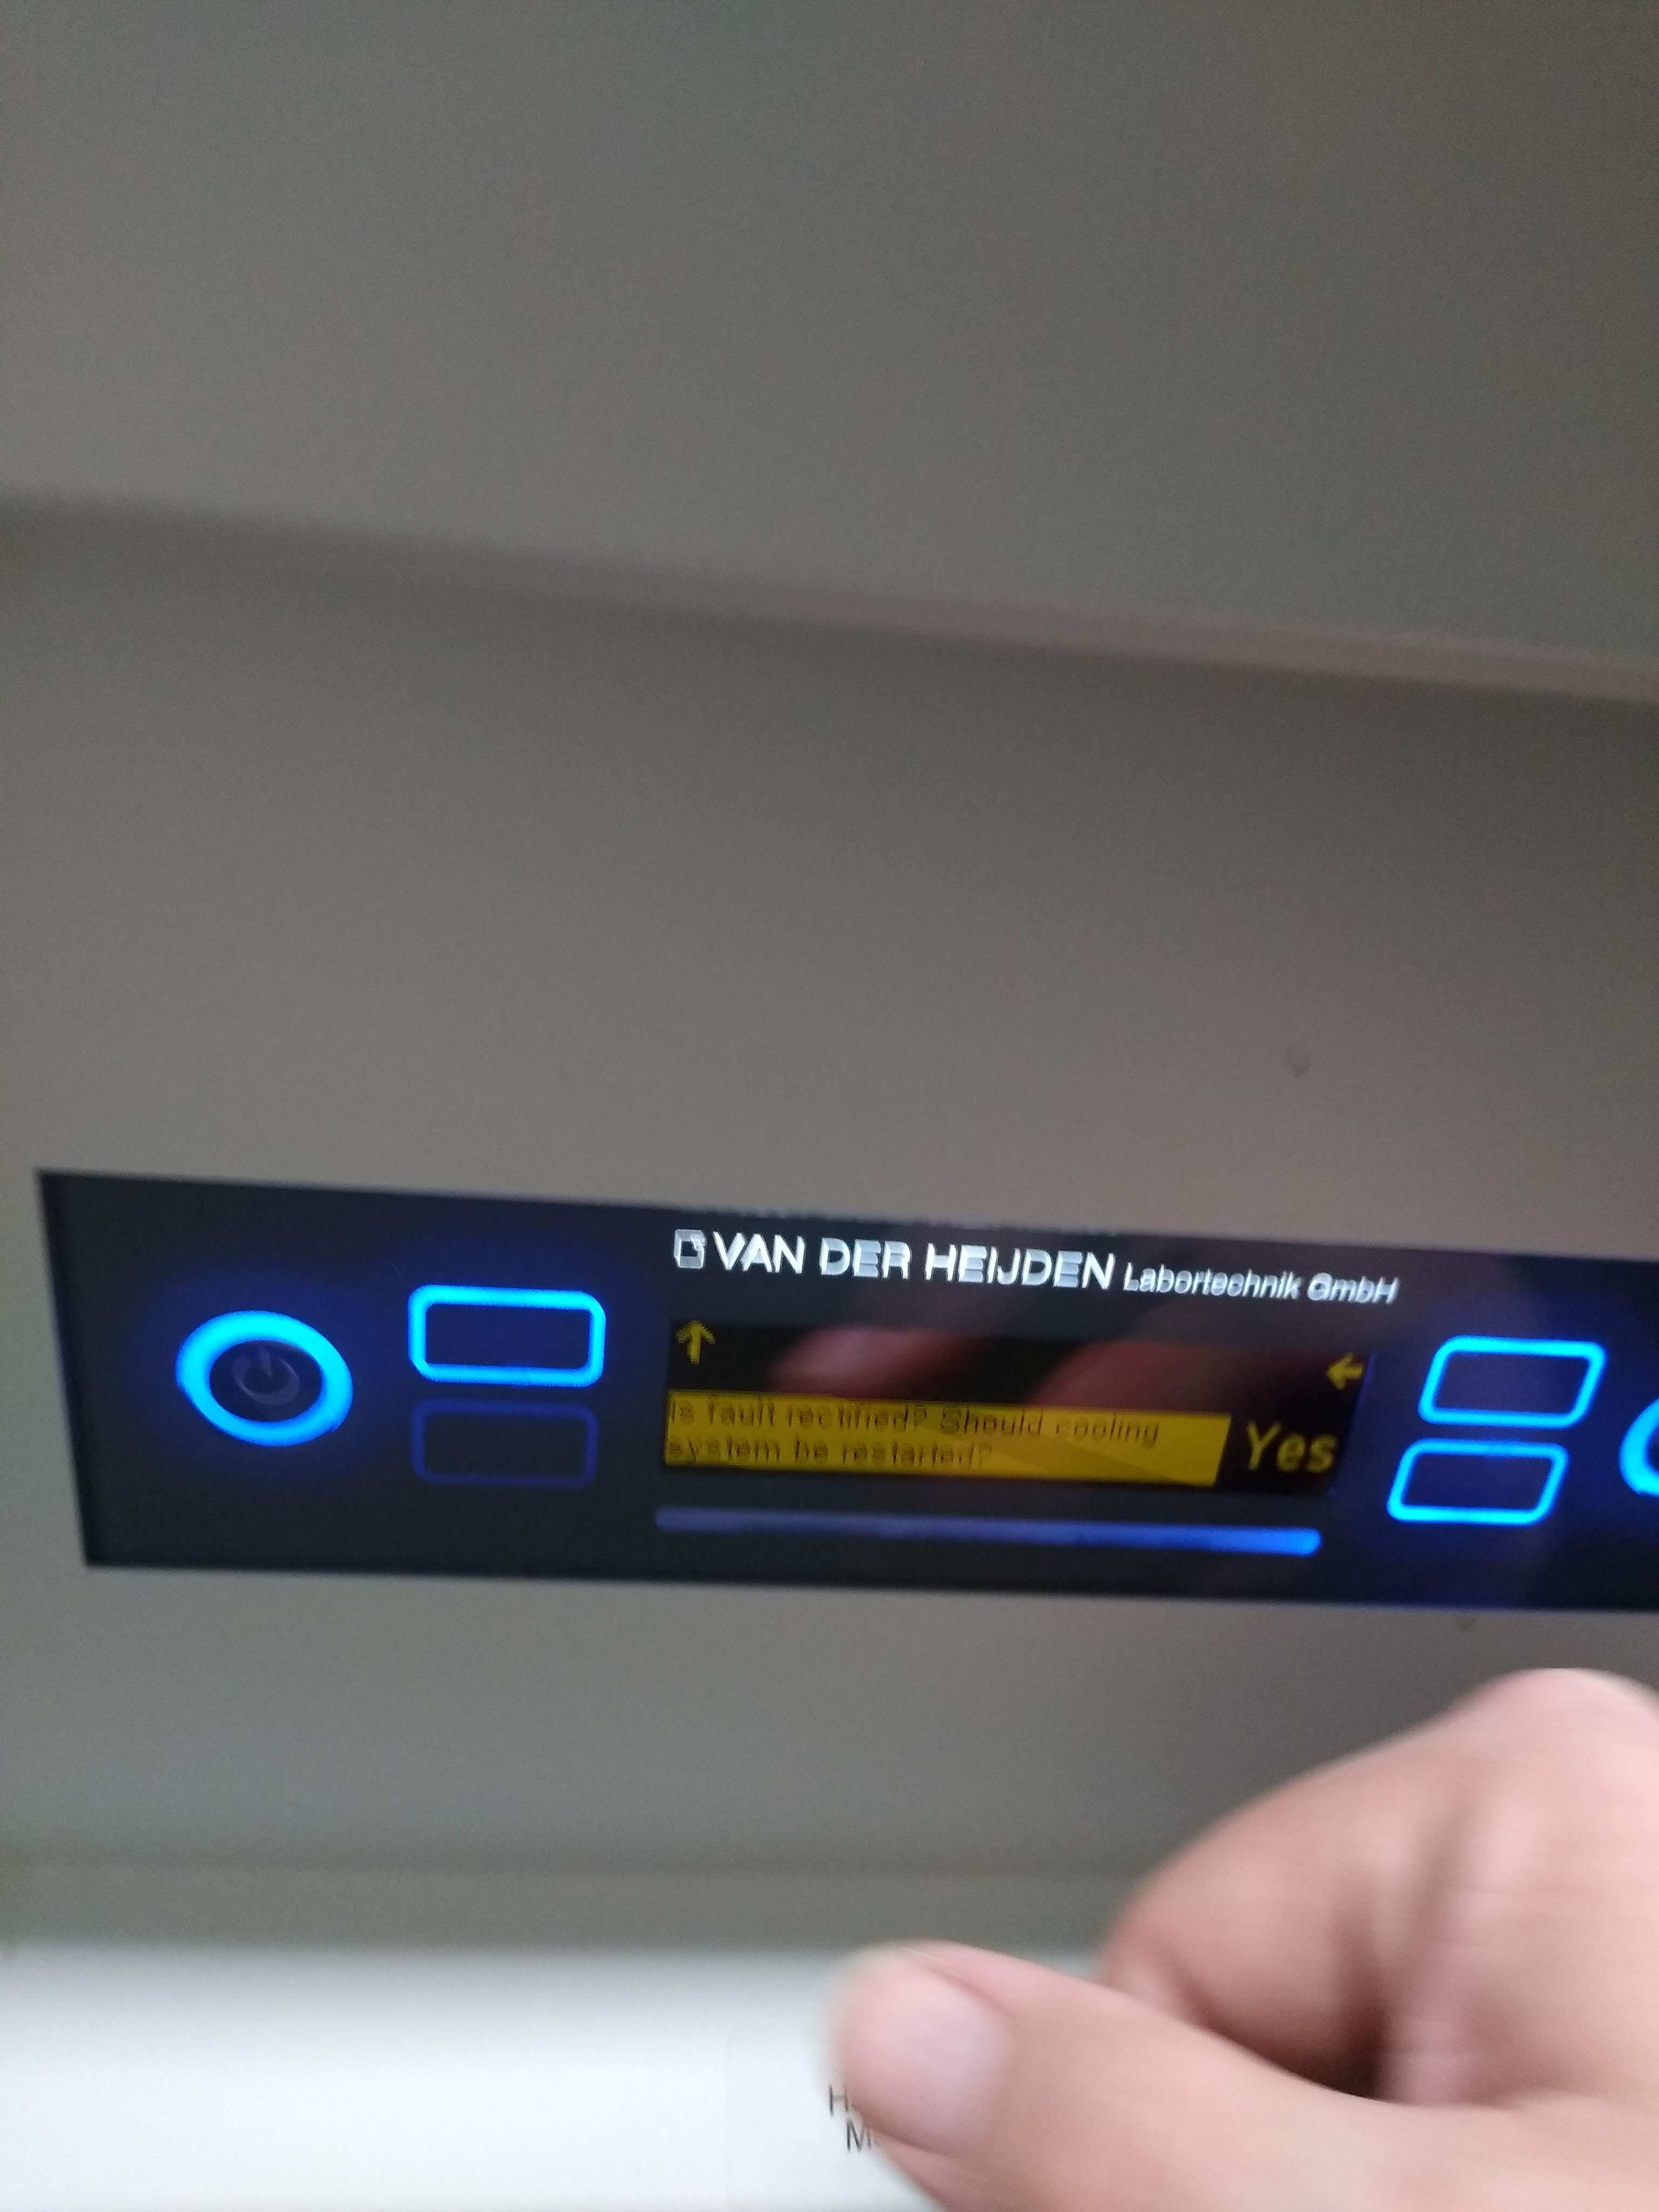
- Once you reached the bottom, the chiller asks if the error is rectified. Push the blue lit rectangular button on the bottom right of this display to confirm "Yes" (Figure 14).
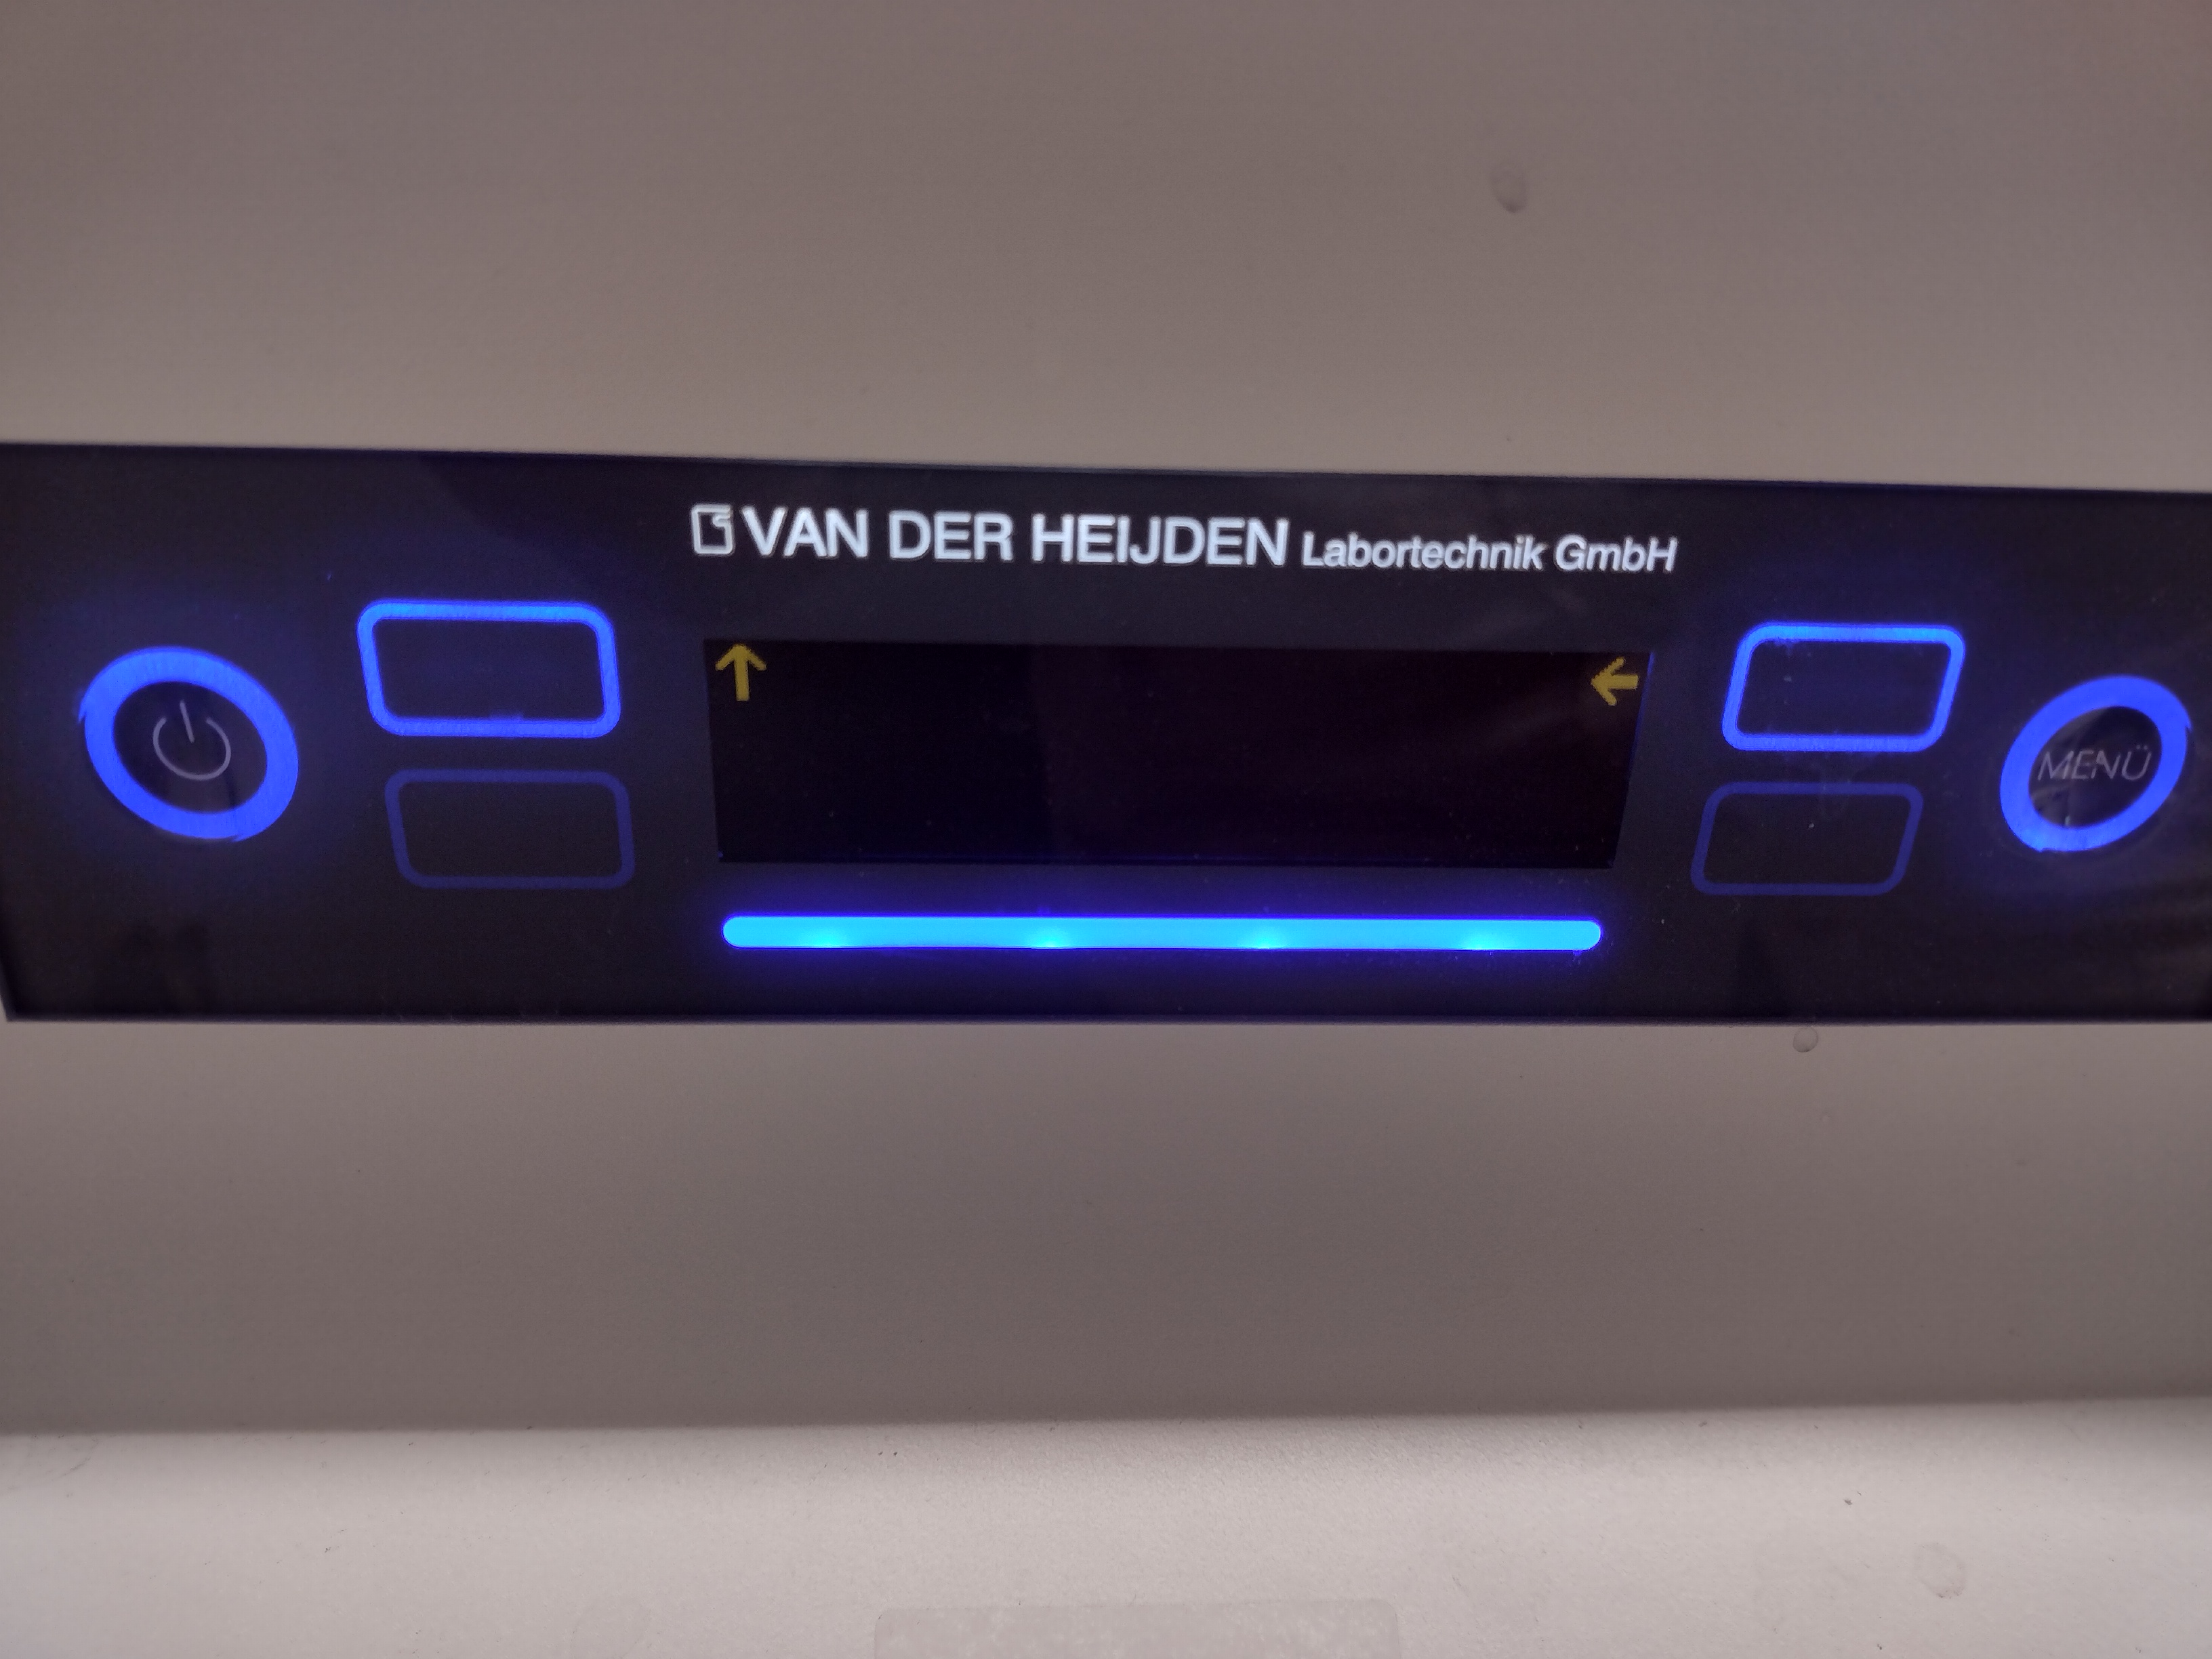
- The display will indicate the restart (Figure 15).

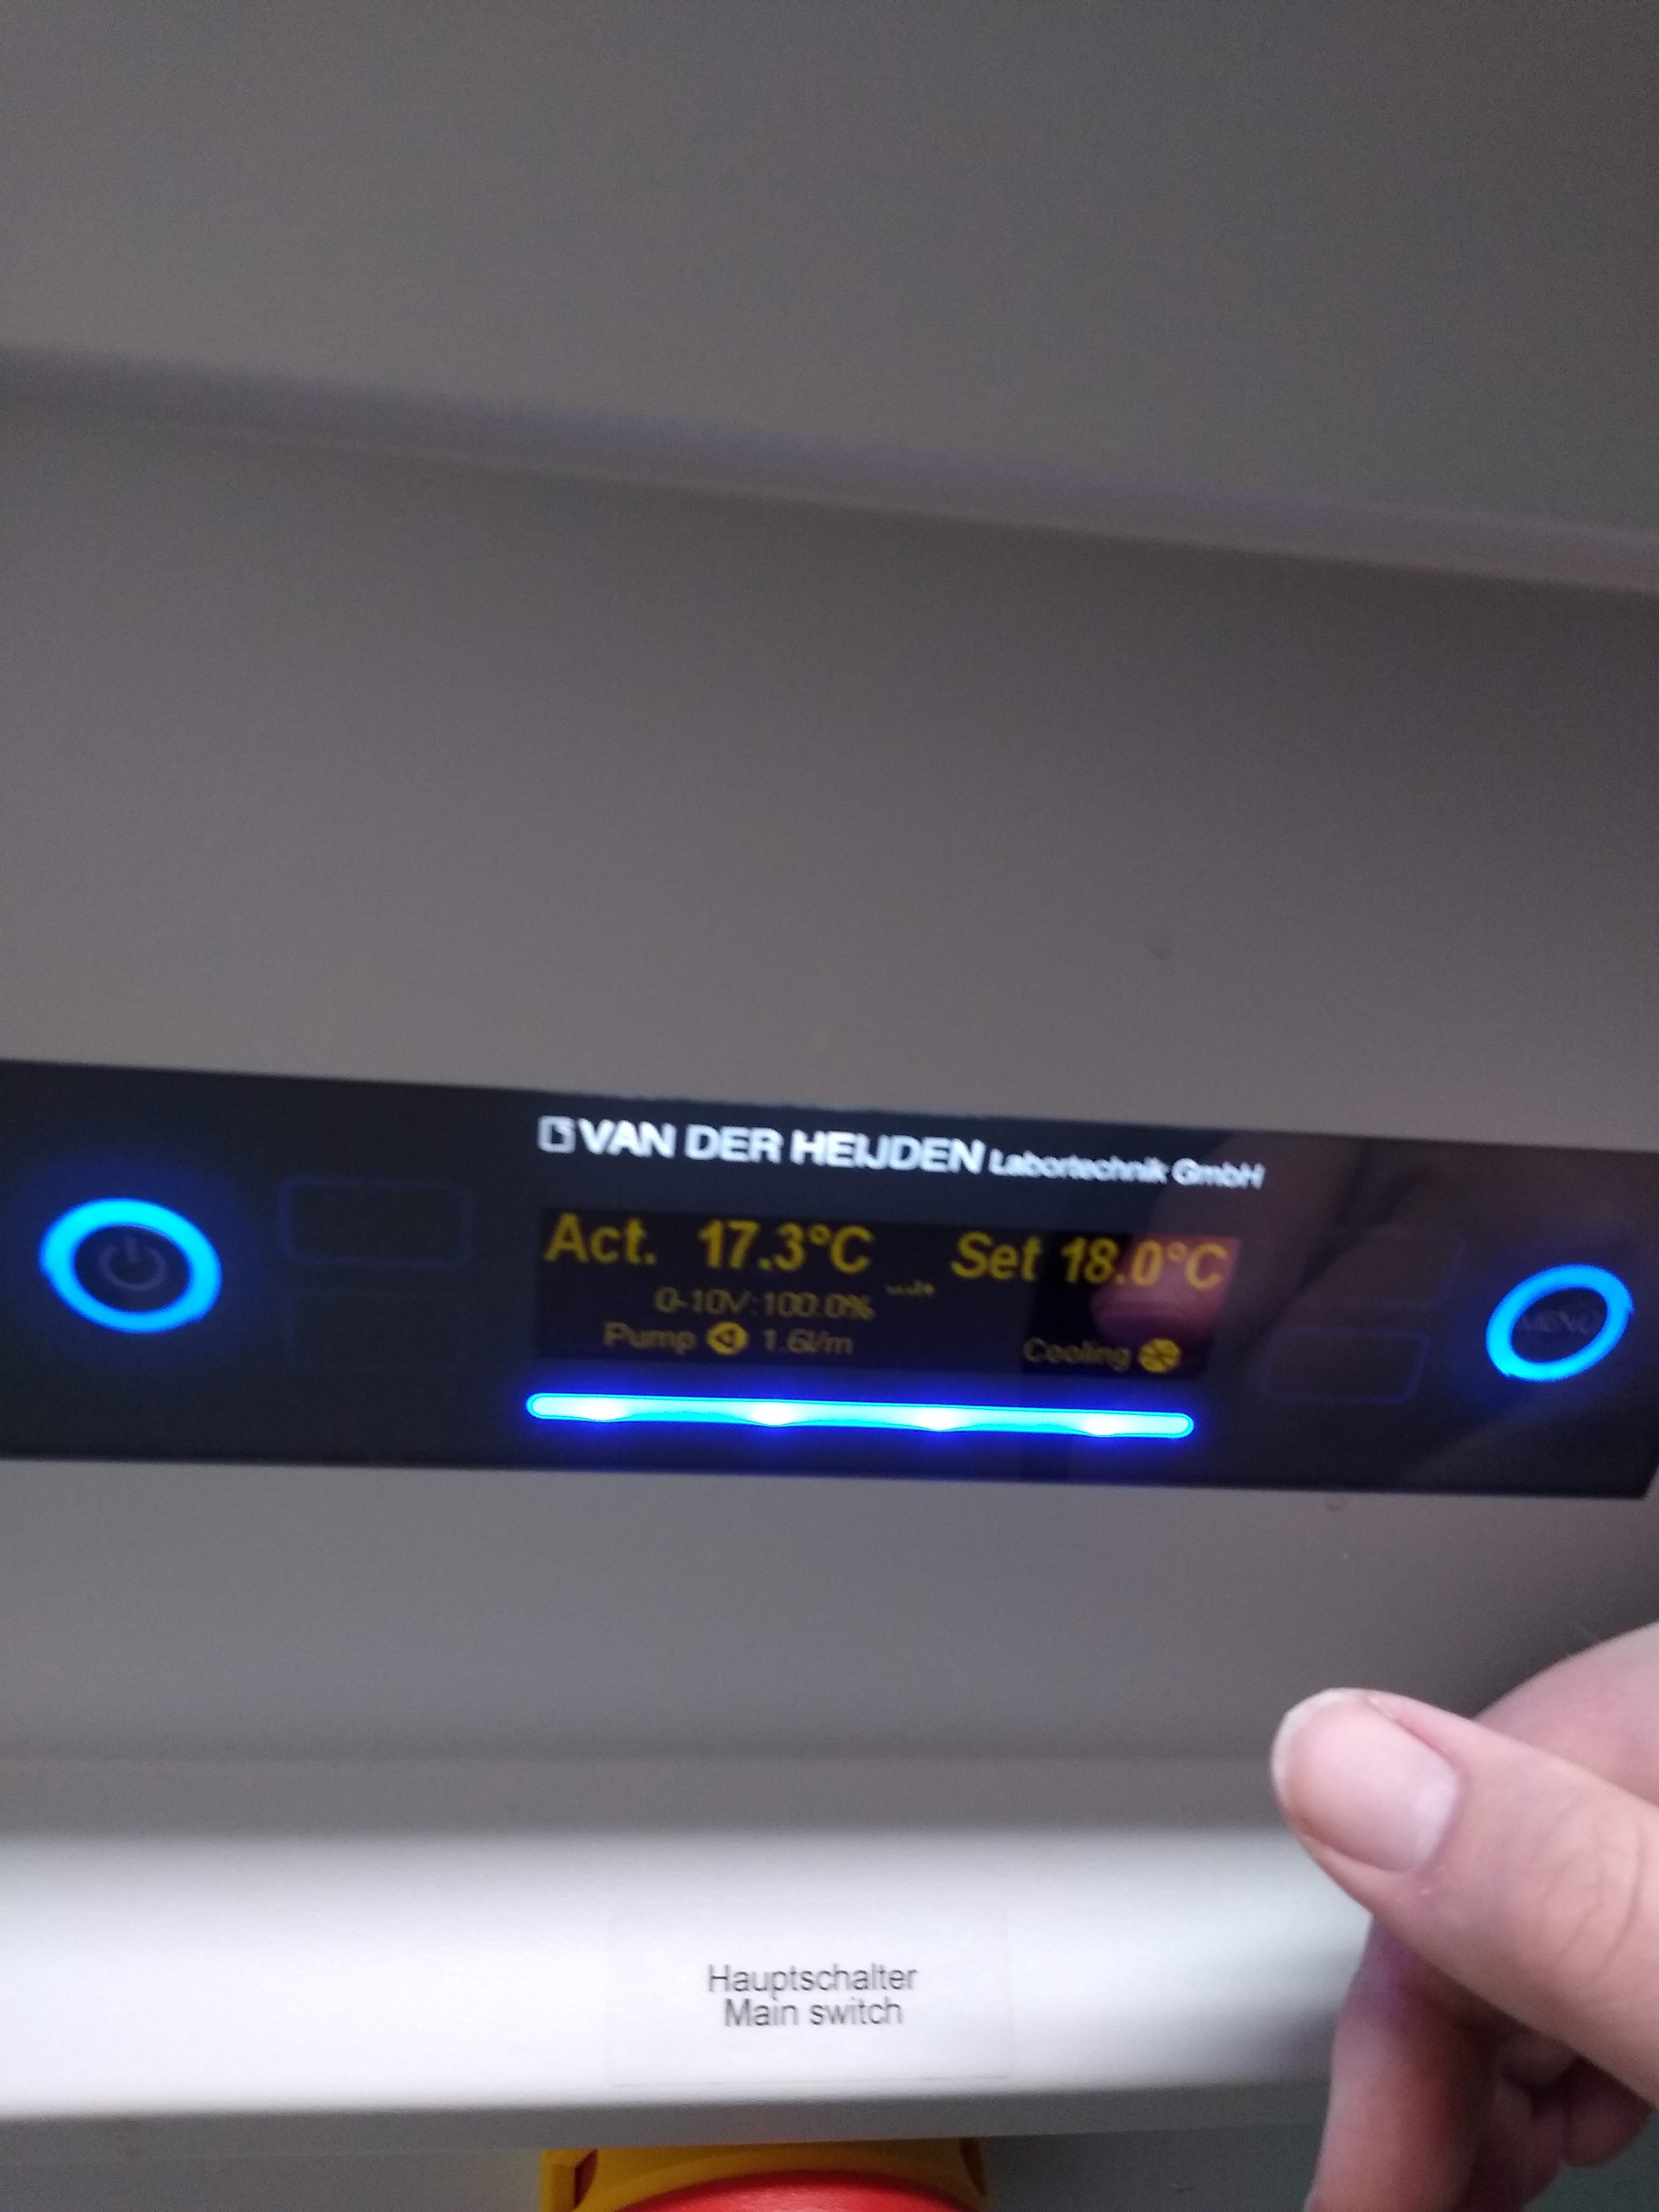
- The display should return to normal with a blue line below the display and indicate temperature and flow (Figure 16).
- Switch on the Gatan Digitizer by touching the large "G" button
- Back in the CryoARM user room the PC should have started. Log in, start TEM center server and wait until the vacuum recovered before starting normal operation.
- In the meanwhile, start the Gatan Camera Server PC.
- Once the Gatan PC restarted you can log in and start Digital Micrograph as usual.